Propeller Toy/Collaborative Onshape
Assignment
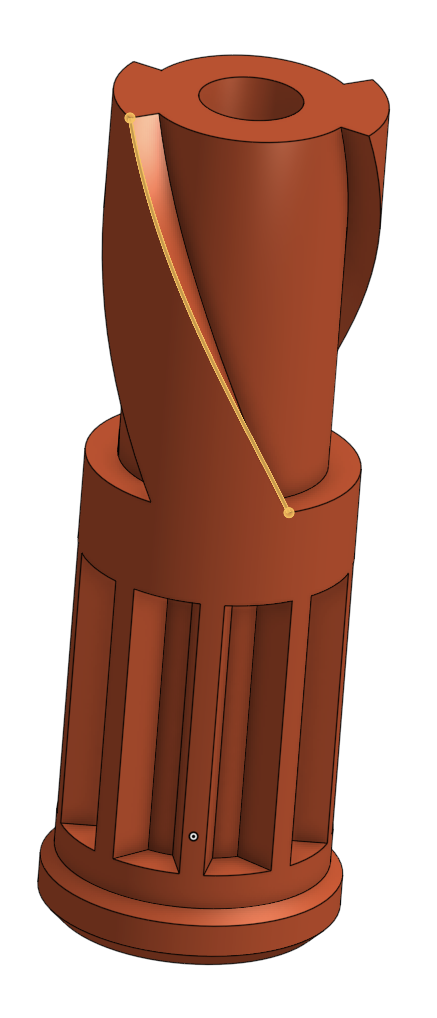
For this assignment, two students were to create a small toy that would launch a propeller when you pulled a cord, learning about Onshape’s collaboration features along the way. Partners were assigned different tasks by the assignment that could be done in parallel. For example, one student might be designing the propeller while the other designed the pull cord.
Document
The document is available for viewing here.
Media

Reflection
I learned a lot here. First of all, Onshape’s collaboration tools are much more advanced than I thought they were, providing something akin to Google Docs CAD. In addition, I really got a change to explore the branching features because I ended up doing some of my partner’s work on a separate branch while they were absent. Also, because the part was designed for Metric M2 bolts, I had to adapt it to use the imperial #4-40 bolts that the lab stocks. Because the part’s design intent was implemented well, this was pretty painless. In addition, I explored the helix tool for the first time. I’ve used a parametric featurescript before when I needed a curve, but it’s good to know that Onshape has some of these tools natively.
Swing Arm
Assignment
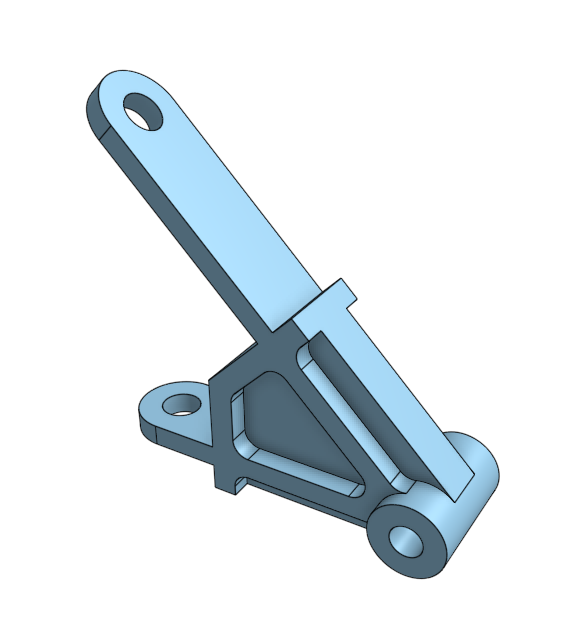
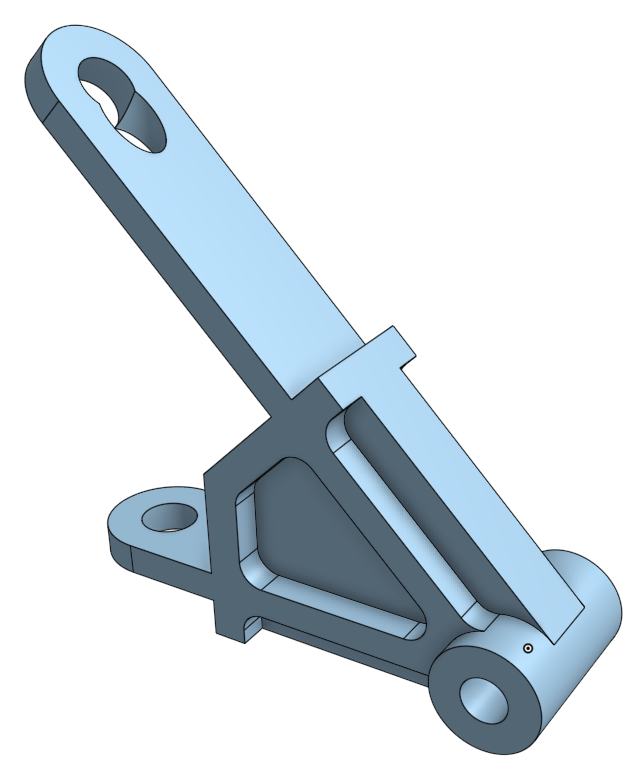
This was the class’s first attempt at designing a part only from drawings. We were given a PDF of drawings of a part and once we had designed it, we checked to see if it weighed the correct amount. If it didn’t weigh the correct amount, we had made a mistake, so we would then have to fix it. In addition, we were encouraged to design as much of the part as possible by only constraining things to each other instead of explicitly dimensioning them. This helps preserve design intent.
Document
The document is available for viewing here.
Media
Reflection
All things considered, this went fairly well. I only had one thing go wrong, and it was easily fixed (an extrude that was set to “through all” should have been “up to face,” see the image for how this broke). I discovered that almost everything can be constrained in a sketch if you really think about your design intent.
Multi-Part Design
Assignment
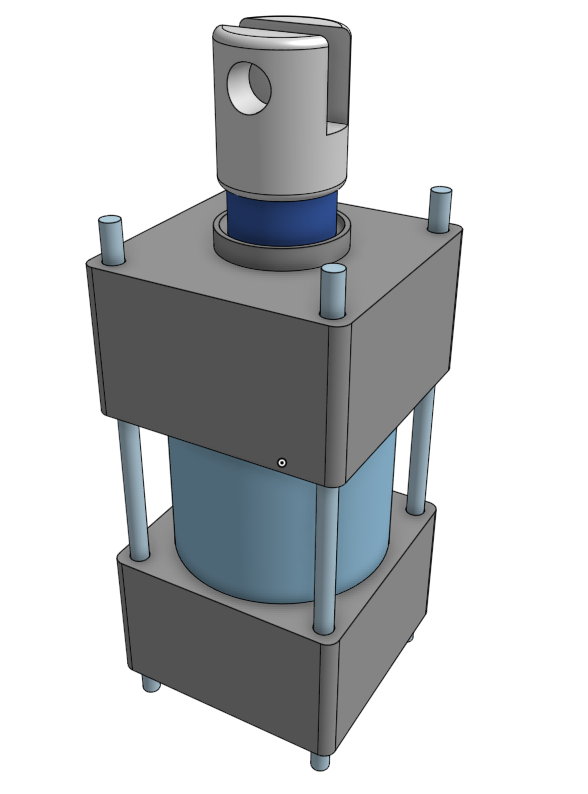
This was another “Here’s the drawings, good luck!” assignment. This one, however, had 9 parts instead of just one. Again, the assignment was checked by making sure the part had the right mass. Then, a dimension would be changed, and the mass would be checked again to make sure the part responded according to the design intent.
Document
The document is available for viewing here.
Media
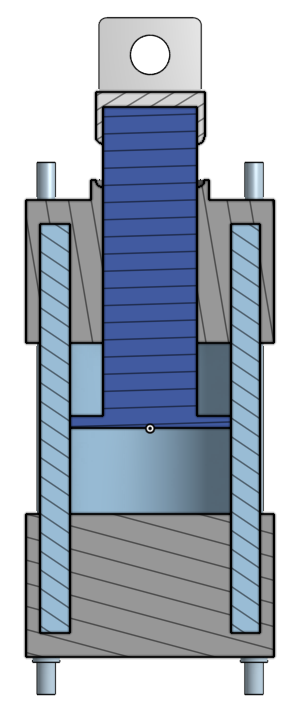
Reflection
I really enjoyed this project. The big challenge here was designing the parts in the correct order to make it easiest to preserve design intent. For example, the bolts holding the part together needed to extend 15 mm past each end, so it made sense to design them after the cap parts to enforce this relationship. Then, when a revision pushed the caps farther apart, the bolts automatically expanded to preserve design intent.
Assembly Certification
Assignment
We were given an Onshape course to take that was mostly review, with a few new things. The Onshape course was called Onshape Assemblies.
Documents
The documents I worked in are available here, here, and here.
Media
Reflection
This course was a nice refreshed for the various types of mates, and there was an extremely helpful chart provided here. The big thing I learned was how to make new mate connectors between entities, and I look forward to applying this in the future.