neopixel.py
A basic test of the M4’s onboard NeoPixel. Flashes through off, red, green, and blue.
Assignment
For this assignment, we just had to make the onboard neopixel change colors.
Code
The code is available at neopixel.py. For the sake of space it will not be pasted in full here.
Media
![]()
Reflection
This assignment was just a test to make sure that everything was running correctly. While there was an optional assignment to make the NeoPixel rainbow, I chose not to do it because I wanted to move on to the other assignments. I felt I could accomplish more interesting things this way.
servo.py, internet_servo.py
A basic servo motor control test and a website to control a servo.
Assignment
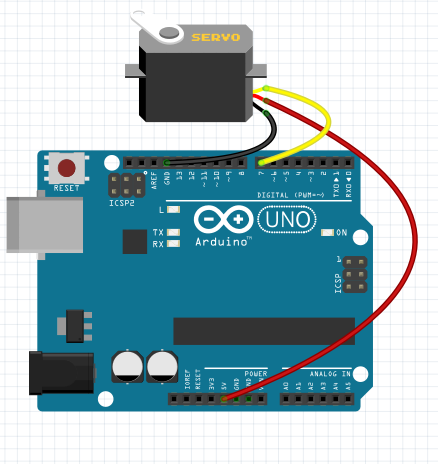
For this assignment, we had to make a servo sweep across its length. There was an option make the servo controllable with capacitive touch, but because the new boards we are using do not support that natively (instead requiring a supplemental 1MOhm resistor) I decided to make the servo controllable over the internet instead.
Code
The code is available at servo.py and internet_servo.py. For the sake of space it will not be pasted in full here.
Circuitry
Media
Reflection
I ran into a bit of trouble making the servo cross its full range of motion. It turns out that the servos we have need a slightly wider pulse range than default. This was a good exercise in troubleshooting and learning from documentation.
hcsr04.py
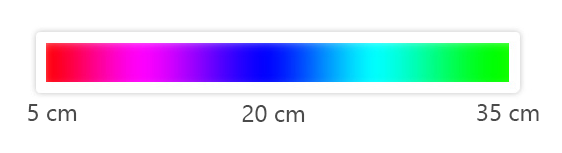
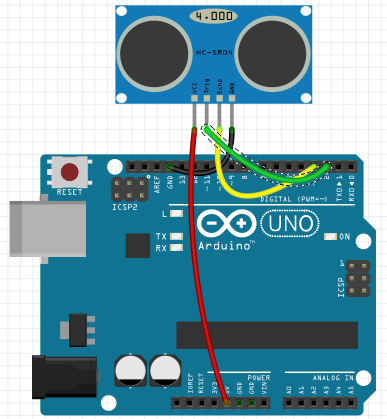
Fades the onboard NeoPixel through different colors depending on the distance detected by an ultrasonic sensor.
Assignment
For this assignment, we had to make the NeoPixel on board the Metro change color according to the following diagram:
Code
The code is available at hcsr04.py. For the sake of space it will not be pasted in full here.
Circuitry
Media
Reflection
Originally, I tried to make a method that was very easy to extend and modify, but it ended up taking too much time for a non-functional product. I pivoted to doing it the easy-to-write, hard-to-modify way and finished it in no time. Sometimes this is a necessary sacrifice to make but it requires knowledge of the future uses of the project.
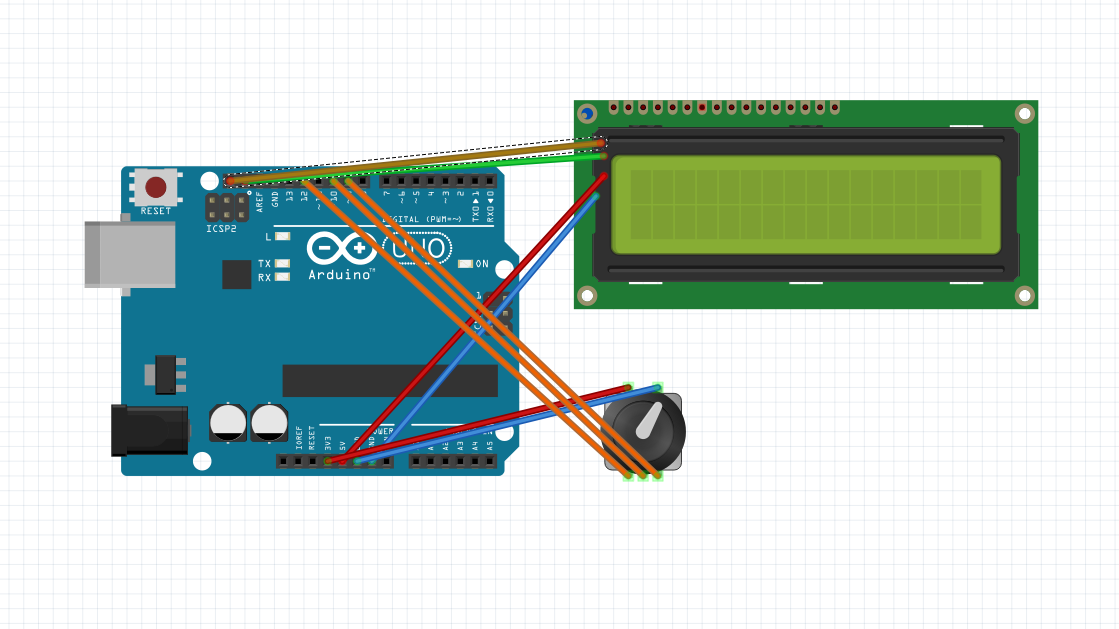
lcd.py, internet_lcd.py
Allows control of a pair of LCD screens over a website
Assignment
For this assignment, we had to make 1 or 2 LCD screens display a count that was controllable by some input method. I wanted to test my internet code, so I chose to control it over IoT.
Code
The code is available at lcd.py and internet_lcd.py. For the sake of space it will not be pasted in full here.
Circuitry
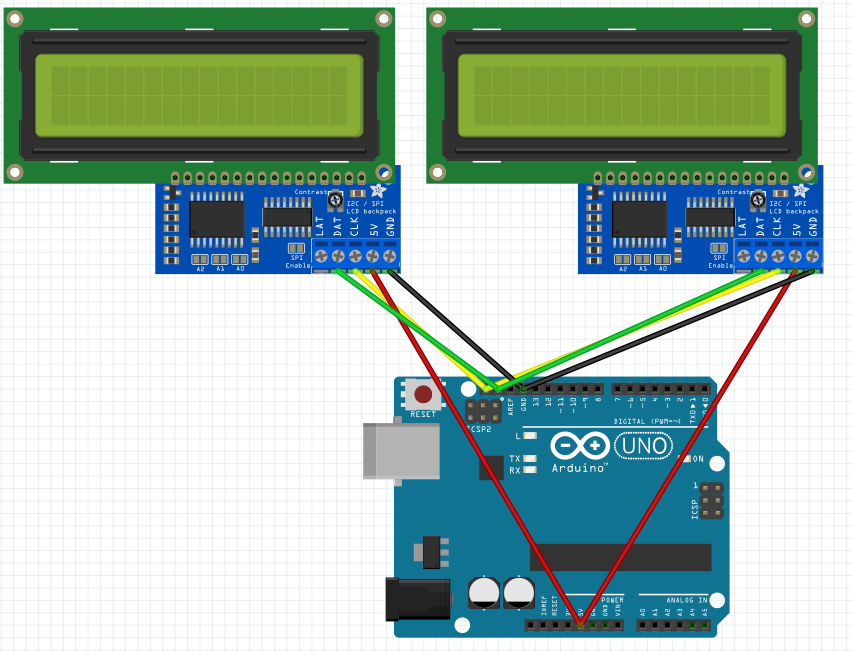
Media
Reflection
This went relatively easily because of how adaptable my internet code is. I’m very proud of how simple it is to drop it into a new application and be up and running with only a few lines of code. I was also able to use a test bench I made last year to quickly detect the address of any given LCD screen, so it was nice to be able to reuse an old project as a useful time saver.
motor.py, motor_pid.py
Assignment
For this assignment, we had to make a DC motor spin by reading a potentiometer and controlling its power with PWM. I had way more time than I needed to do this, and because the rig I was using to hold my motor had a conveniently mounted photointerrupter I wanted to try and get some PD control working.
Code
The code is available at motor.py and motor_pid.py. For the sake of space it will not be pasted in full here.
Circuitry
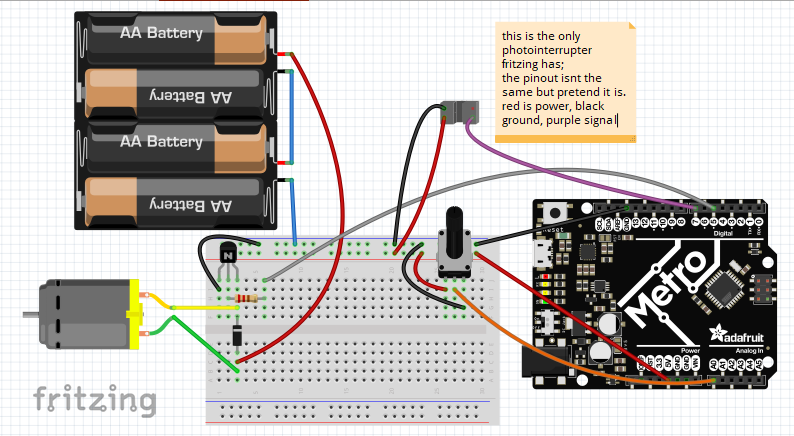
Media
Reflection
This project was really helpful for my understanding of some basic control theory. While I’ve worked with PID controllers and encoders before, they’ve always been pre-implemented and I haven’t had to go too deep in the weeds. I rewrote this code at least 3 times. The first rewrite I implemented async code and interrupts instead of synchronously polling the photointerrupter. The second time I changed from looking at how many pulses had occurred over the last second to looking at the average time between pulses, which proved to be much more accurate and responsive. I found this website to be extremely helpful in providing methods of measuring the speed of the motor.
encoder_trafficlight.py
Assignment
For this assignment, we had to make a “traffic light” out of the onboard NeoPixel controlled by a rotary encoder and a menu on the LCD. The rotary encoder was to scroll through color options and clicking the switch was to set the NeoPixel to the selected color.
Code
The code is available at encoder_trafficlight.py. For the sake of space it will not be pasted in full here.
Circuitry
Media
Reflection
I’m really proud of how I did the menu logic for this project. The encoder library gives a position in “clicks from startup position.” I have a list of menu strings and colors, like this:
colors = [("stop", (255, 0, 0)), ("caution", (128, 128, 0)), ("go", (0, 255, 0))]
Then, to get the color I should be using, I can simply take the element of the list at encoder.position % len(colors). This will smoothly loop around the list. Also, once again, our hardware is not quite the default configuration. This means in the initialization of the encoder library I have to set the divisor argument of the rotaryio.IncrementalEncoder to 2 instead of 4.
tmp36.py
Assignment
For this assignment, we had to display the current temperature on an LCD as measured by a TMP36 temperature sensor.
Code
The code is available at tmp36.py. For the sake of space it will not be pasted in full here.
Circuitry
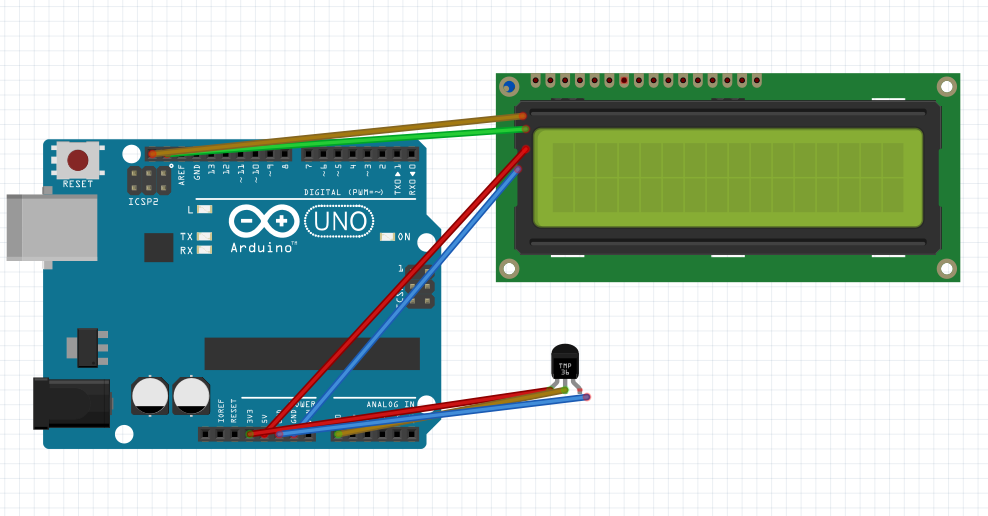
Media
Reflection
The first time I tried this I ended up superheating a TMP36. It was the end of the period, so I didn’t have time to analyze my likely wiring mistake, and it worked fine the next class, but my bet is that I had power and ground flipped around. Ironically, the datasheet of the TMP36 advertises its “low self-heating,” a claim which absolutely did not hold up under abuse. I thought I had double checked the orientation of the sensor, but I evidently got it wrong. It was a very tangible reminder to always, always, ALWAYS check polarity.
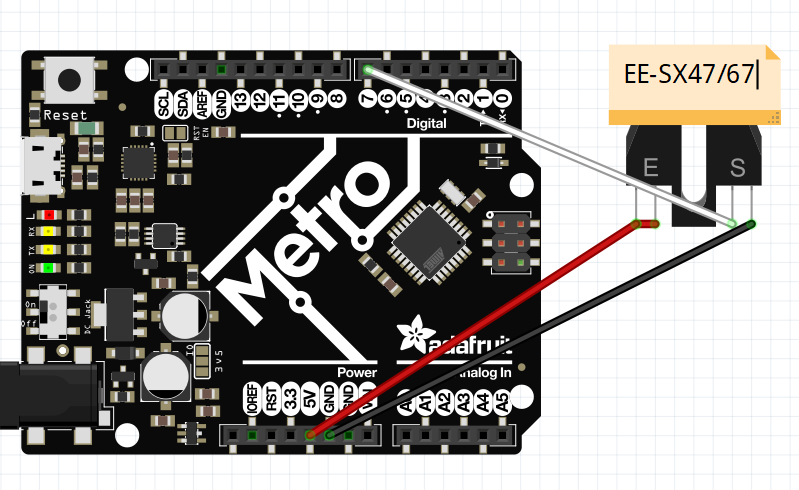
photointerrupter.py
Assignment
For this assignment, we had to count the number of times a photointerrupter’s beam was interrupted.
Code
The code is available at photointerrupter.py. For the sake of space it will not be pasted in full here.
Circuitry
Media
Reflection
The first time I used photointerrupters was for motor_pid. Then I used CircuitPython’s countio interrupts to count pulses. This time, I polled the sensor pin. I think this method is slightly less accurate, though it is less hassle to set up.