The main code repository is located here.
Media test:

Launchpad part 1
This is the first in a series of assignments in which I build a simulated launchpad. For this assignment I just had to make the Pico count down from 10 to 1 in the console.
Media
Wiring
No wiring was needed for this assignment.
Reflection
This was a nice test project to make sure I had everything configured properly. (I didn’t.) I ended up changing upload toolchains from MicroPython to my CPyProjectTemplate, remembering to change the board type from last year’s Metro Express to the Pico W. There was also a good bit of fighting with Git over this change, and after running into errors tring to git revert a few times, I ended up deleting the repo and starting over from the template, which wasn’t a huge problem because I hadn’t done much work in the deleted repo.
Launchpad part 2
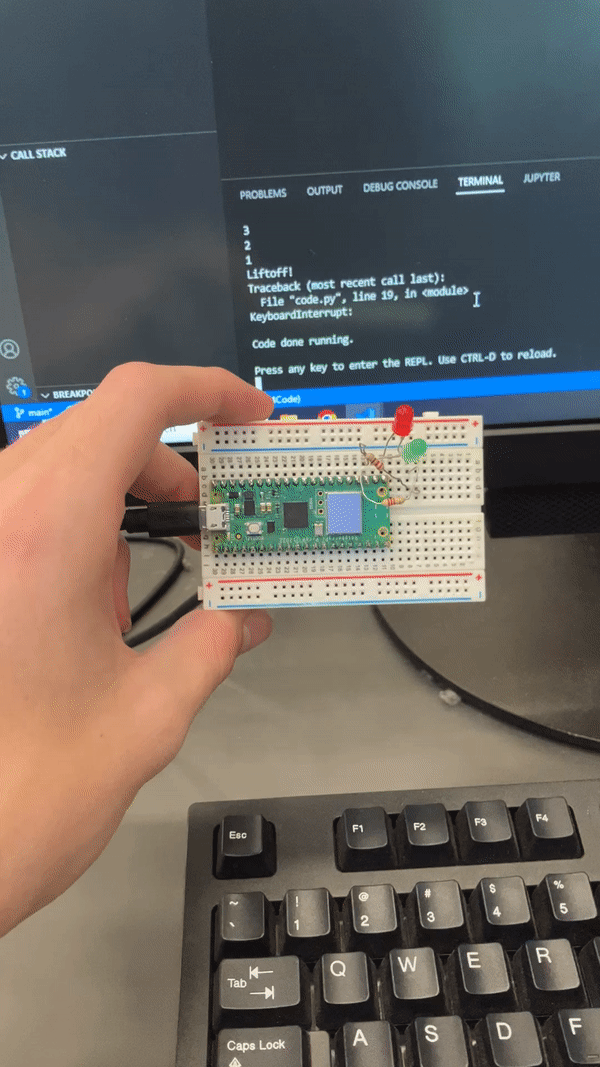
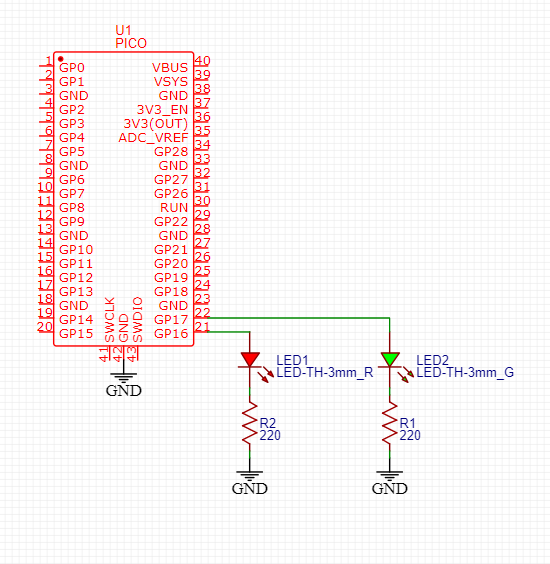
This is the second assignment in the launchpad series. We had to add a red flashing light to the Pico that blinked in sync with the countdown, and a green light that turned on at liftoff.
Media
Wiring
Reflection
This went mostly without hitches, but there was one nuance: When a CircuitPython ends, all hardware is deinitialized and set to an input. This turns off all connected components. Because of this, when my program immediately ended after turning on the green LED it turned right back off. To prevent this I added an infinite loop at the end of the program.
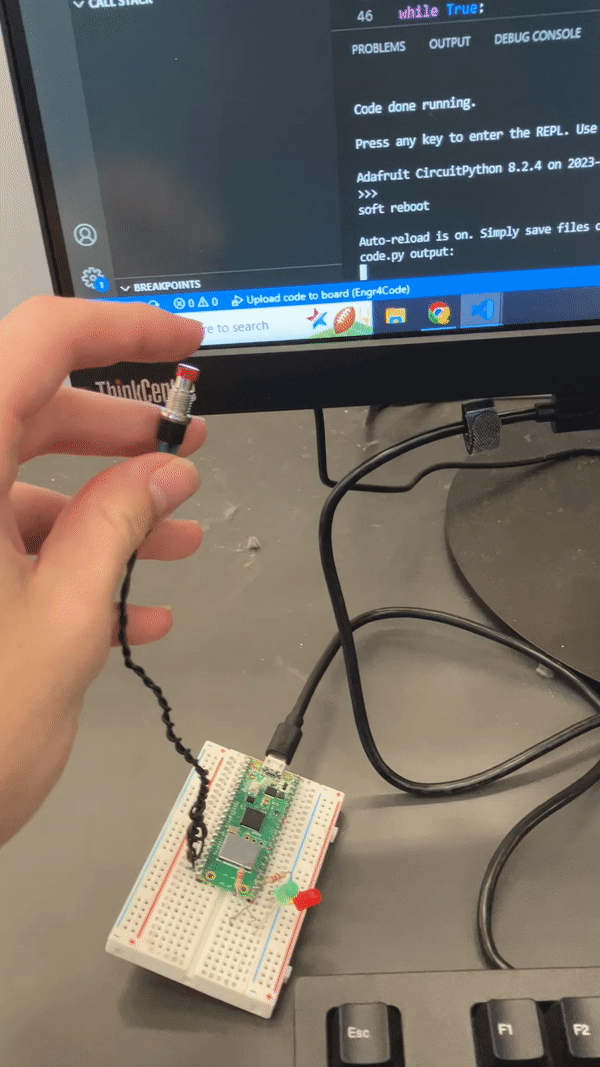
Launchpad part 3
This is the third assignment in the launchpad series. We added a button that could start and stop the countdown.
Media
Wiring
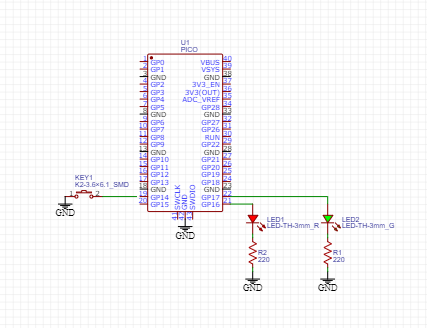
Reflection
I did the spicy option here, which involved adding an abort button. This was non-trivial because I had to watch the button while delaying. A full async framework would have been overkill for this, so I just wait for 0.05 seconds then check the button for 20 times.
Launchpad part 4
This is the fourth assignment in the launchpad series. We added a servo to “release the rocket” as the clock hit zero It had to start its move at T-3 and smoothly finish at T-0.
Media

Wiring
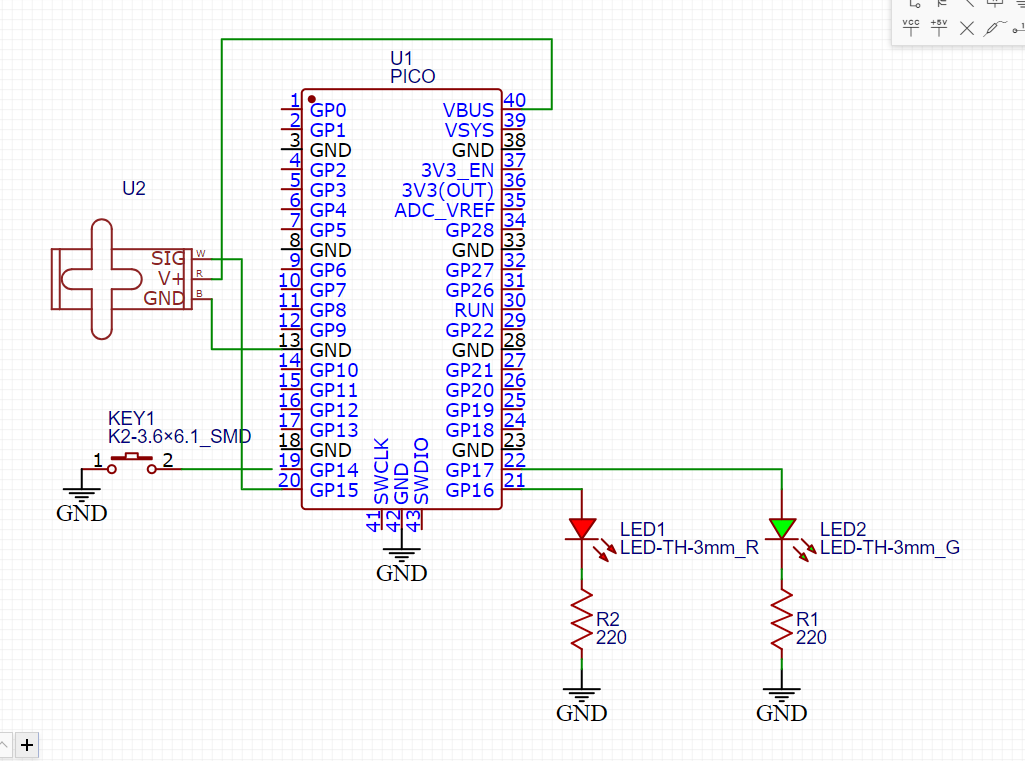
Reflection
Having to make the servo move smoothly made me realize the way I wrote part 3 was really inextensible. I had apparently forgotten about being able to use time.monotonic() instead of time.sleep() for doing stuff while delaying. With the help of Arduino’s map() function, I was able to get the servo moving pretty smoothly.
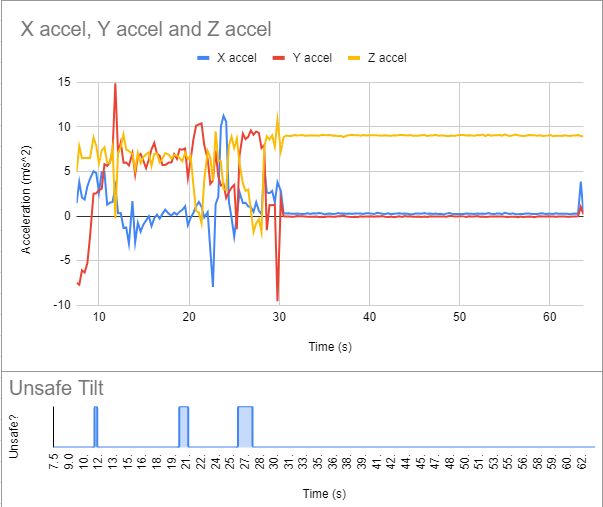
Crash avoidance part 1
This is the first in a series of assignments in which I build a simulated crash avoicance system for a helicopter. For this assignment I had to read the acceleration values off on an accelerometer.
Media

Wiring
Reflection
This went really smoothly. The one small hitch was that I forgot to put a sleep() in the main loop to begin with, so the accelerations were logged at max speed. I added a half-second sleep and everything was fine.
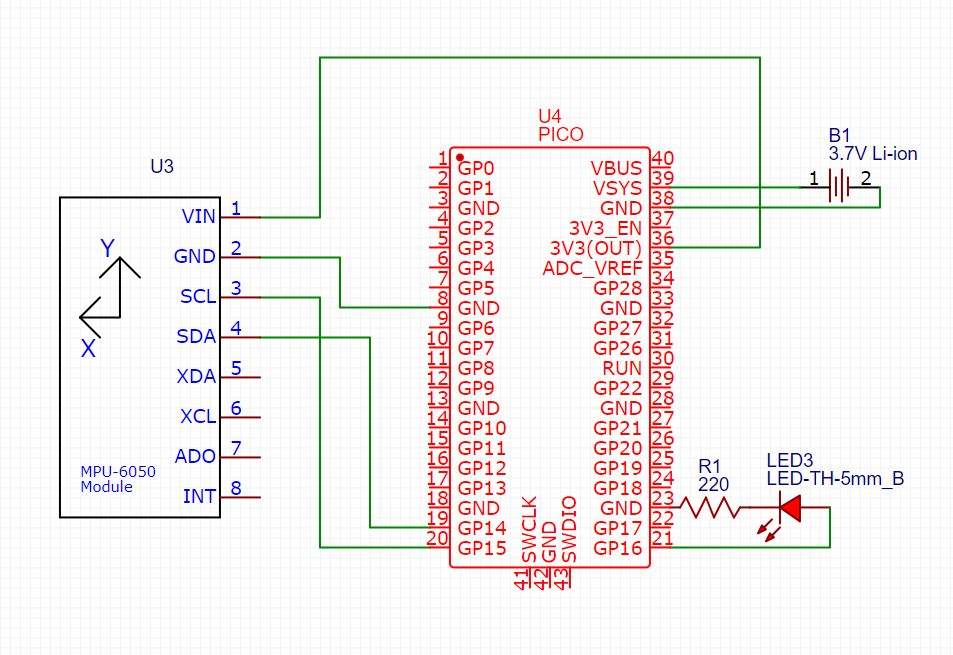
Crash avoidance part 2
This is the second assignment in the crash avoidance series. I added an LED to indicate when the board was dangerously tilted and a battery so the board could be carried around.
Media

Wiring
Reflection
To detect if we’re at a dangerous tilt, I just check if the absolute value of the Z component of the acceleration is less than 1 m/s². This is a fairly naive way of doing things, and if I wanted to detect a different angle I would need to do more complex trig. However, it works for this assignment, and it’s simple, so it’s staying.
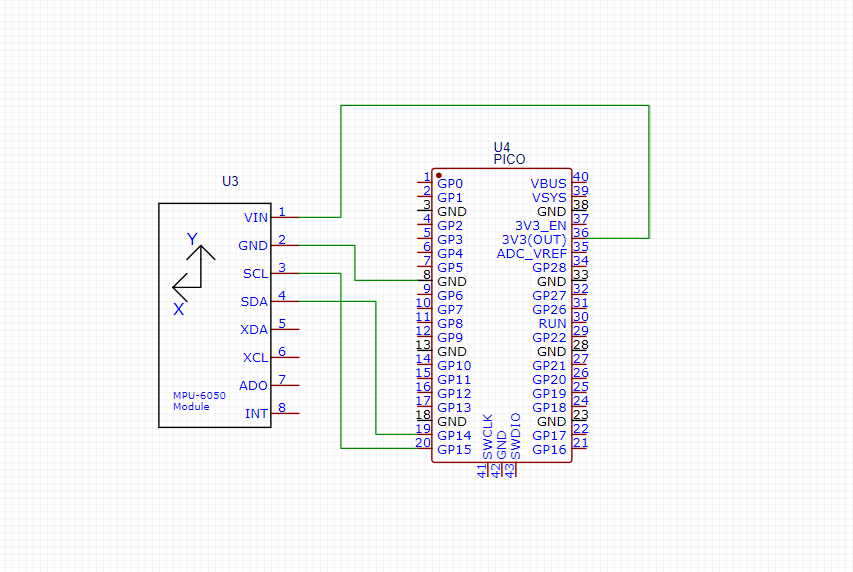
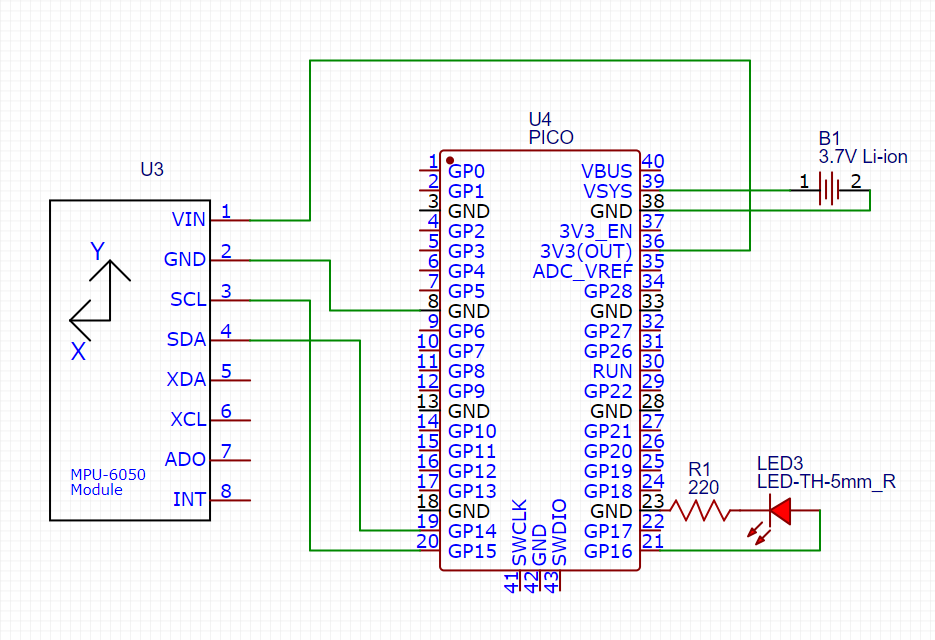
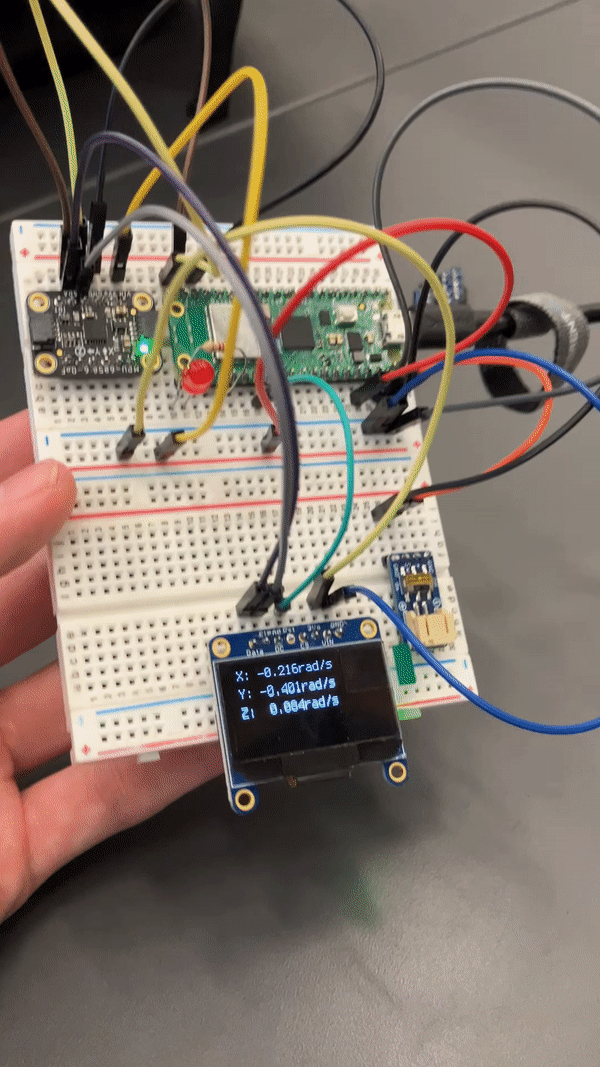
Crash avoidance part 3
This is the third assignment in the crash avoidance series. I added a gyroscpe to report rotation rate.
Media
Wiring
Reflection
When I was making the schematic for part 3, things got a little more cluttered than I liked. To fix this, I used net labels for common power rails and busses to reduce the number of wires in the schematic. It was a bit of a pain doing this now, and I should have done it from the start.
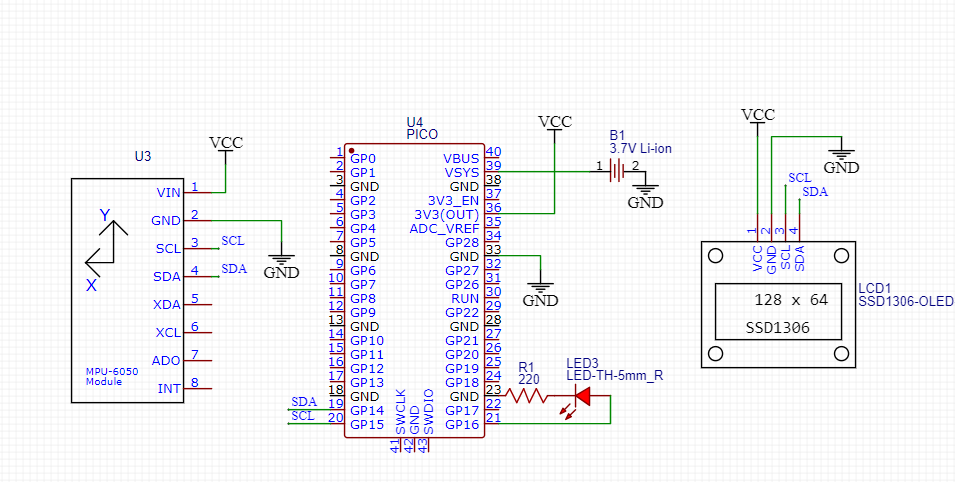
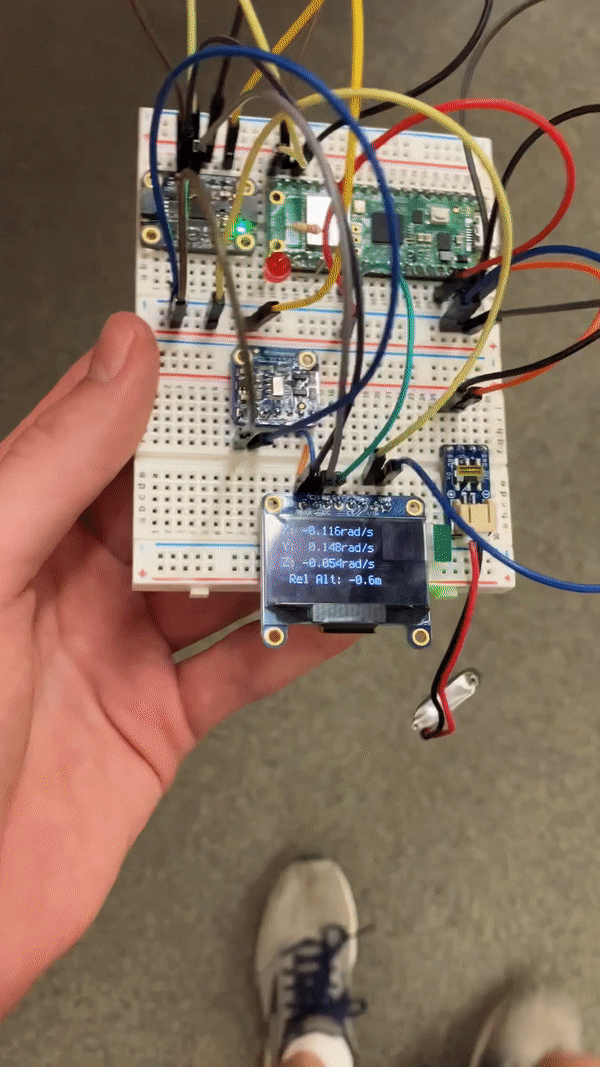
Crash avoidance part 4
This is the fourth assignment in the crash avoidance series. I added an altimeter to not activate the altitude alarm if the board had risen at least 3 meters.
Media
Wiring
Reflection
I had to relearn a bit of the Python f-string formatting language. (Here’s a link to the docs for the future.) In this case I had to make a 3-digit fixed point representation of the number with a space used in place of a plus sign, so the code was : .3f.
Landing zone part 1
Assignment
This is the first in a series of assignments in which I build a simulated landing zone evaluator. For this assignment I just had to get the area of a single landing zone, using the power of functions.
Media
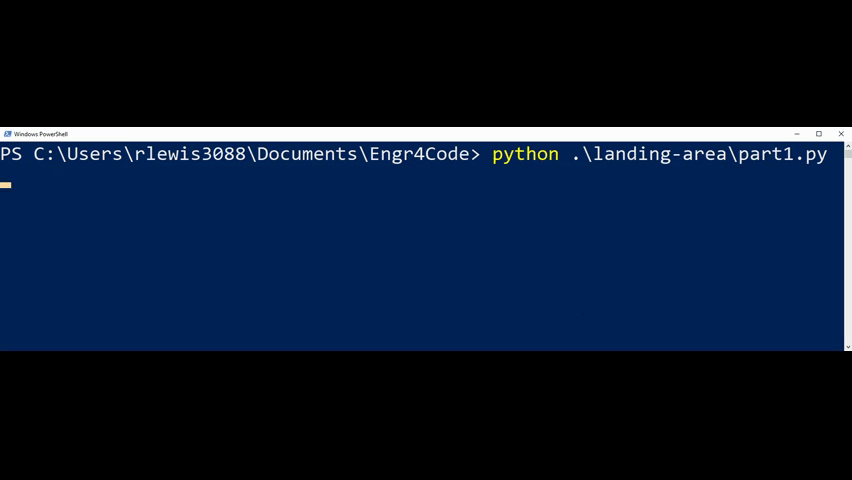
Wiring
No wiring was needed for this assignment.
Reflection
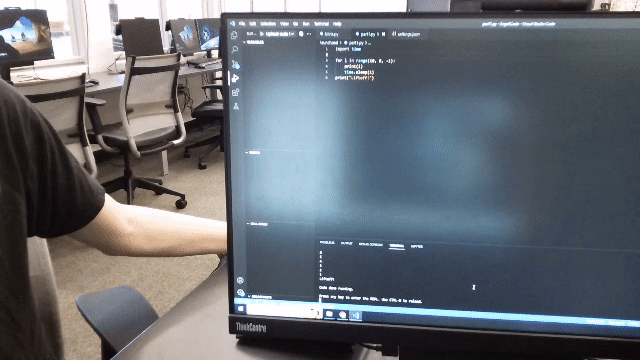
This was the first time I recorded my screen using WeVideo. I quickly discovered that it does not nicely scale up screen recordings. To work around this I used a massively zoomed in PowerShell terminal instead of the native VS Code terminal to run the code.
Landing zone part 2
Assignment
This is the second assignment in the landing zone series. I added an OLED to graphically display the landing zone location.
Media
Wiring
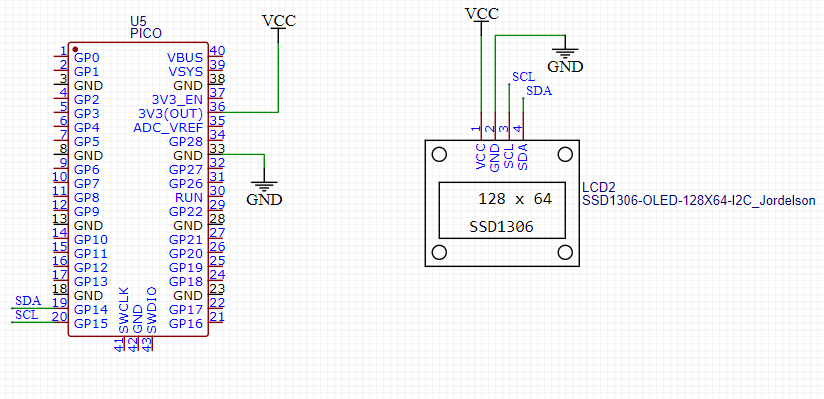
Reflection
I had to do some interesting math to transform the given points (relative to the base at the center of the screen with positive Y being up) to the OLED coordinate space (relative to the top-left corner of the screen with positive Y being down). I initially didn’t do this properly and spent a while trying to figure out why I couldn’t see the triangle that was being rendered off-screen. For the future: To flip the Y axis around, subtract the given value from the location of the x-axis, not the other way around.
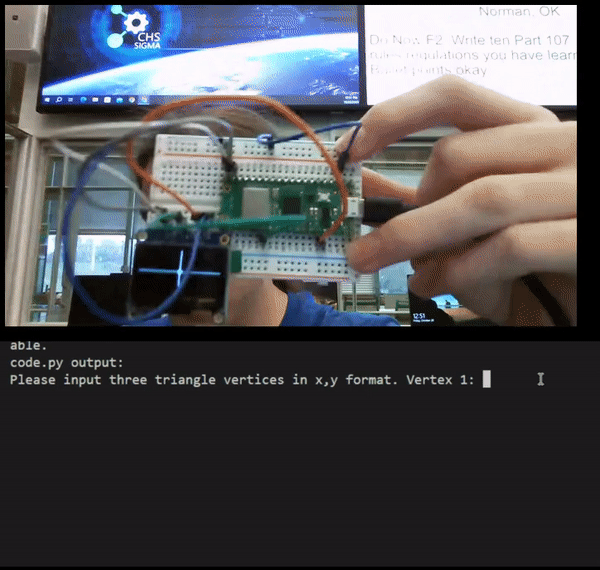
Landing zone part 3
Assignment
This is the third and final assignment in the landing zone series. I now evaluate many landing zones in succession and pick the closest one with an area greater than 100km².
Media
Wiring
Reflection
While I had heard of a centroid before, I’ve never had to calculate one. Turns out it’s just the average positions of the vertexes. Then it’s just iterating through all the triangles and running the area code I developed previously, with a little bit of filtering to make sure the triangle it spits out conforms to the given criteria.
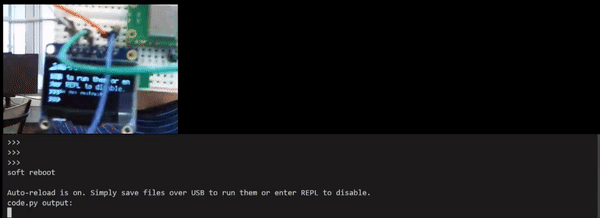
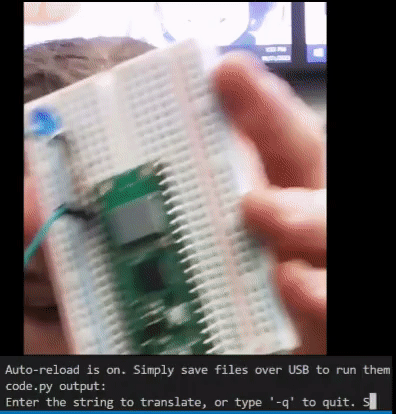
Morse code part 1
Assignment
This is the first of a series of assignments in which I build some tools for using Morse code. For this one I had to translate an English string into a string of Morse code.
Media

Wiring
There is no wiring for this assignment.
Reflection
I wanted to gracefully fail if the user tried to send a character I din’t know how to translate. To do this, I had to break out of nested loops (the main while True, and the for loop looping over the characters in the input). I ended up setting a flag variable if the translation was bad and only showing the result if everything went through properly. I could have used Python’s for...else construction, but I’m trying to stop using that as it’s not super intuitive nor does it have equivalents in other languages.
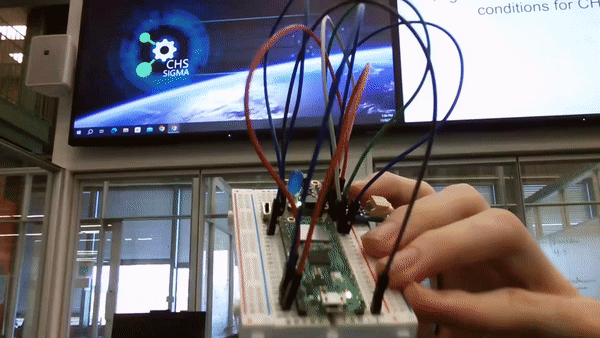
Morse code part 2
Assignment
This is the second assignment in the Morse code series. For this assignment I had to blink out the message on an LED.
Media
Wiring
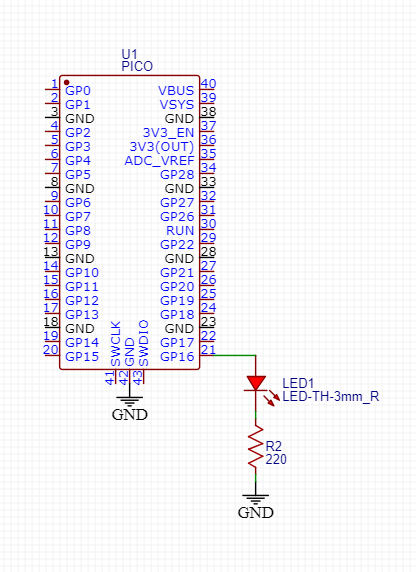
Reflection
I continued to use dictionaries, the focus of these assignments, for this task. I made a dictionary of how each type of blink lasted on and off:
CHAR_DELAYS = {
    ".": [base_delay, base_delay],
    "-": [3*base_delay, base_delay],
    " ": [0, 3*base_delay],
    "/": [0, 7*base_delay]
}
(space is between characters, / is between words). This made it easy to quickly go from the translated string I produced in part 1 to an LED output.
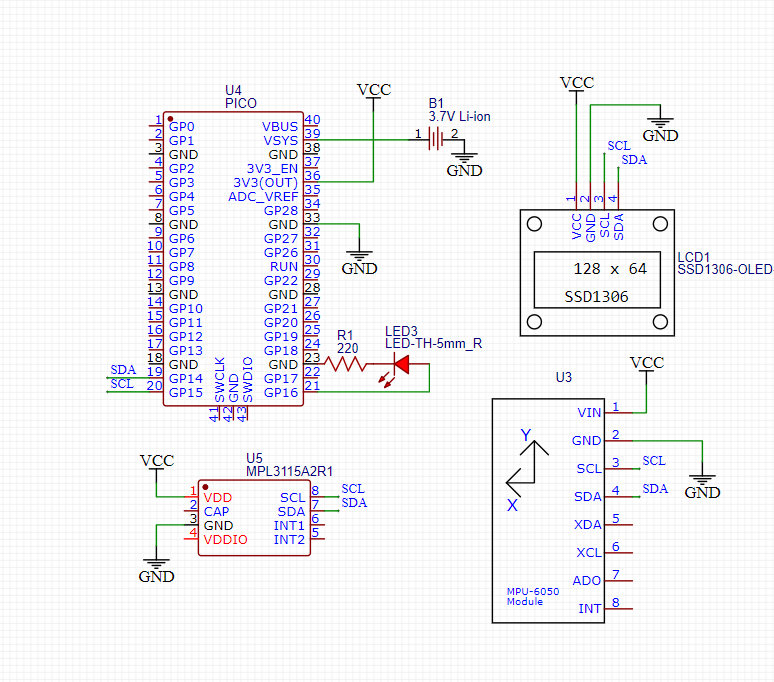
Data logging part 1
This is the first in a series of assignments in which I make use of the Pico’s ability to log data to its onboard storage. For this assignment, we had to log the data we got from crash avoidance part 2 to disk for later analysis.
Media
Wiring
Reflection
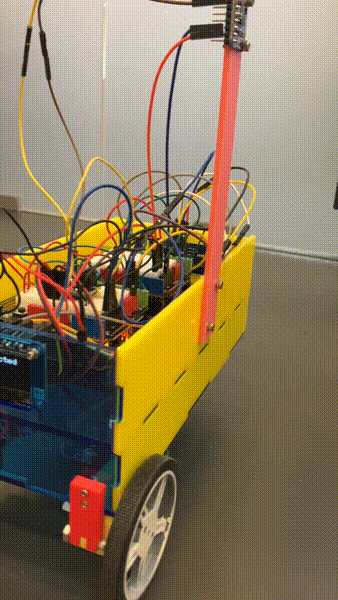
I benefitted a lot from documenting Crash Avoidance Part 2, because it made it easy to put this assignment together. Because this was the second time I assembled this circuit, I took the opportunity to try and compact it. By squeezing all the components right next to each other, I was barely able to get it to all fit on one half breadboard.
Data logging part 2
Assignment
This is the second assignment in the data logging series. For this assignment I had to pull the data collected in part 1 into a Google sheet and make charts of it.
Wiring
There was no wiring for this assignment.
Spreadheet
The spreadsheet is available here.
Media
Reflection
When I wrote my code, I didn’t realize that logging the string “FALSE” and “TRUE” would cause problems when trying to plot. To fix this, in the plot I added another column that turned TRUE and FALSE into the numbers 0 and 1 with an =IF() call. This plotted nicely.