Overhangs are annoying. When 3D printing, you must be cautious to avoid having an overhang of more then a few dozen degrees, and if you do, you must support it with extra support material. This material is annoying to remove and makes the print take longer.

Recently, a few new techniques to print overhangs without support have been popularized. Conical slicing and arc overhangs are two new ideas that allow the printing of overhangs basically by always pulling filament against an already printed surface. I discovered these ideas from two excellent videos by CNC Kitchen.

For one of my high school engineering projects, I needed a roller, which was basically a stack of differently-sized circles on top of each other:

A CAD model of a roller, with 4 large wheels on a thinner axle
A roller.
Normally, this would be a massive pain to print, necessitating the use of a large amount of support material. However, this model is an ideal candidate for support material elimination via arc overhangs. In fact, it’s even easier then that, because while arc overhangs need to glue many arcs together to form a shape, a simple circle can be printed easily.
A visualization of how arc overhangs would need to fill a polygon
A visualization of how arc overhangs would need to fill a polygon. From github.com/stmcculloch/arc-overhang.
A circle filled by a spiral path
A toolpath to fill a circle with a spiral. Note how the outer edge of the spiral approaches the red circle.

The Journey

This project was nicely timed so that I could take on this challenge over winter break and put a lot of time into it. I decided to try to write this G-code generator is Rust, because I’ve been meaning to learn the language for a while. I really enjoyed the experience and found Rust a joy to use. The compiler feedback is impeccable, the integration with VS code works great, and the speed is a nice bonus when I’m trying to get working code and don’t want to spend time optimizing my algorithms. My code is available at github.com/rivques/FunWithOverhangs and should be pretty plug and play.

Simple beginnings

I started by just trying to extrude a line across the build plate. I was initially using the gen_gcode crate, but I quickly realized that it would not be sufficient enough for my needs. Its Point3d type didn’t support any linear algebra operations, so it was a pain to do things like get the distance between two points, and it didn’t support all the G-code that I wanted to use. I suspect its author wrote it to support exactly as much as they needed and no more, and they needed less than me. To fix this, I wrote my own module to handle G-code generation that does exactly as much as I need and fixes a few of the issues I was having with gen_gcode. Even after I was generating coherent G-code, I still wasn’t able to get any extrusion. I figured my math to find how much I should extrude per millimeter I moved was off. Even after fixing a confusion of the radius of the filament with the diameter, it still wasn’t working. I had a hunch that it might have something to do with the long Bowden cable not having enough time to build up the pressure to extrude filament. Sure enough, longer lines worked enough that I was willing to push ahead.
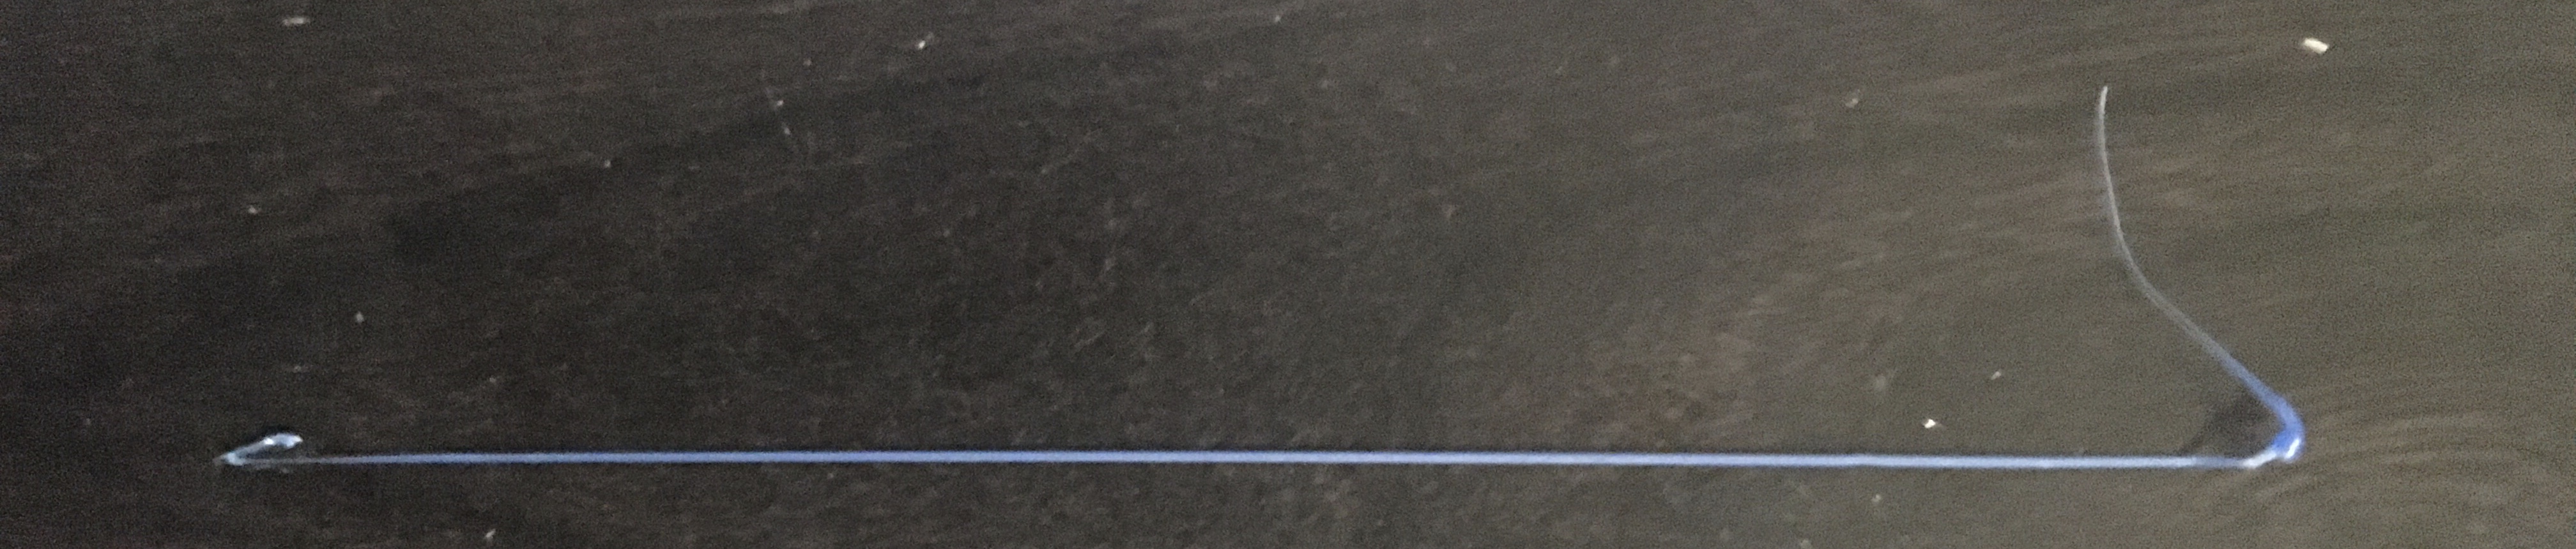
A thin extrusion of plastic
One of the first things I extruded with the G-code generator.

Cylinders

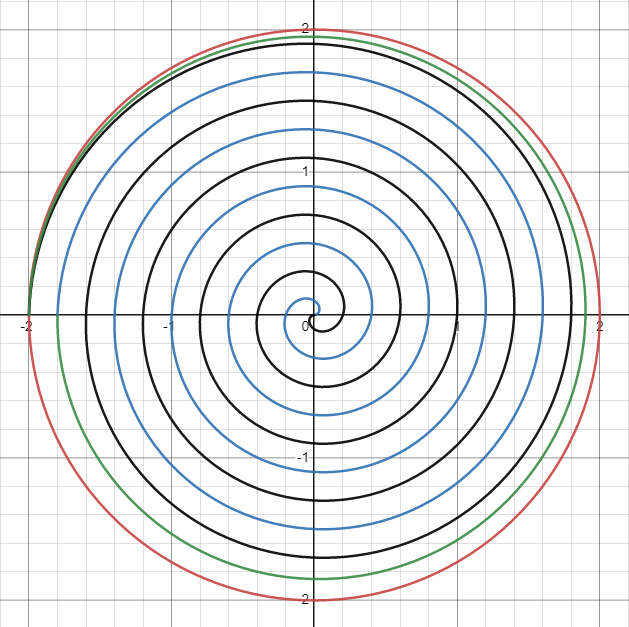
I next tried to generate a circle. A quick bit of research confirmed that there was a spiral with a consistent distance between its lines. The Archimedean Spiral, with the conveniently simple formula $r=aθ$, has a consistent inter-line spacing of $2πb$. It was fairly simple to plug my line width of $0.4$mm into this, then loop over $θ$ for however many rings were needed to achieve the desired diameter. One issue I ran into was that Rust doesn’t support iterating over a range with a non-integer step, so instead of iterating in radians I iterated in degrees then immediately converted them to radians. Here’s my code for this, with a few modifications for clarity (again, the whole program is on my Github):

for theta_deg in (0..(360*(diameter/2.0/line_width).floor() as i32)).step_by(5) {
    let theta = theta_deg as f64 * PI / 180.0; // convert theta to radians
    let r = (spacing / (2.0*PI)) * theta; // compute r
    let point = point3!(r*theta.cos() + starting_location.x, r*theta.sin() + starting_location.y, printer.position.z);
    printer.extrude_to(point) // automatically calculate the needed extrusion
}

After I had a circle, it was easy to stack a few on top of each other, and now I was making cylinders!
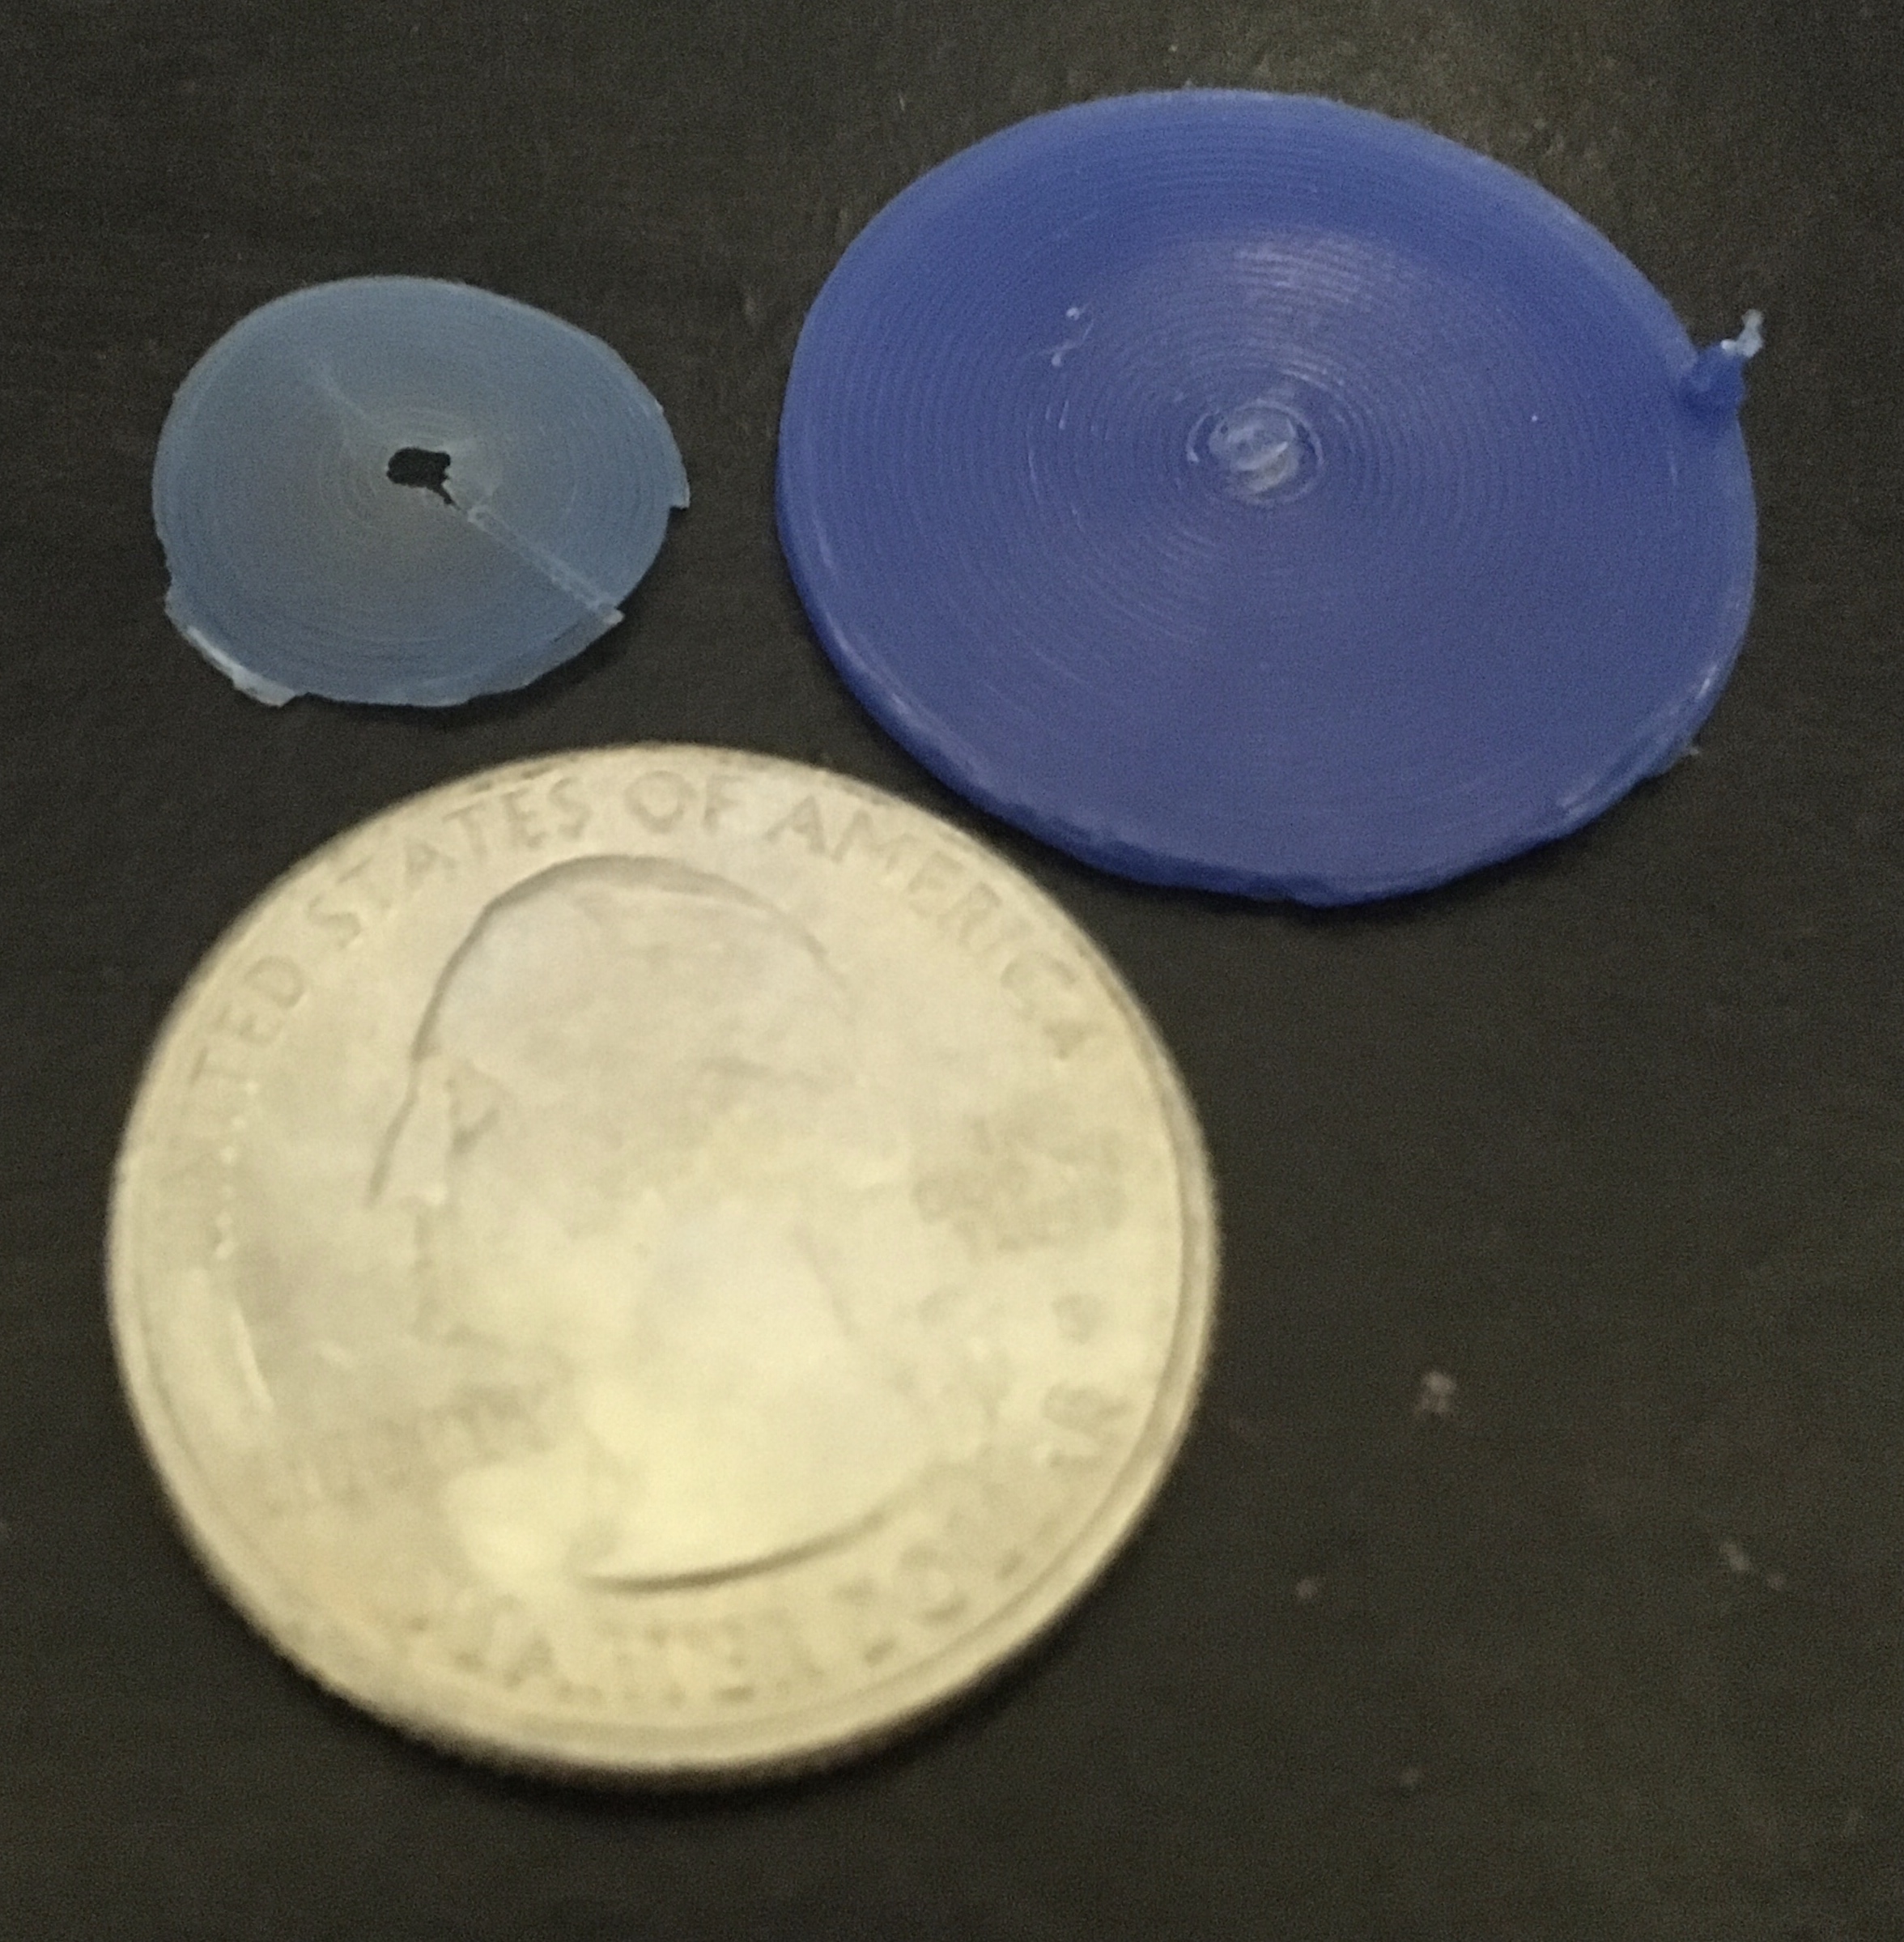
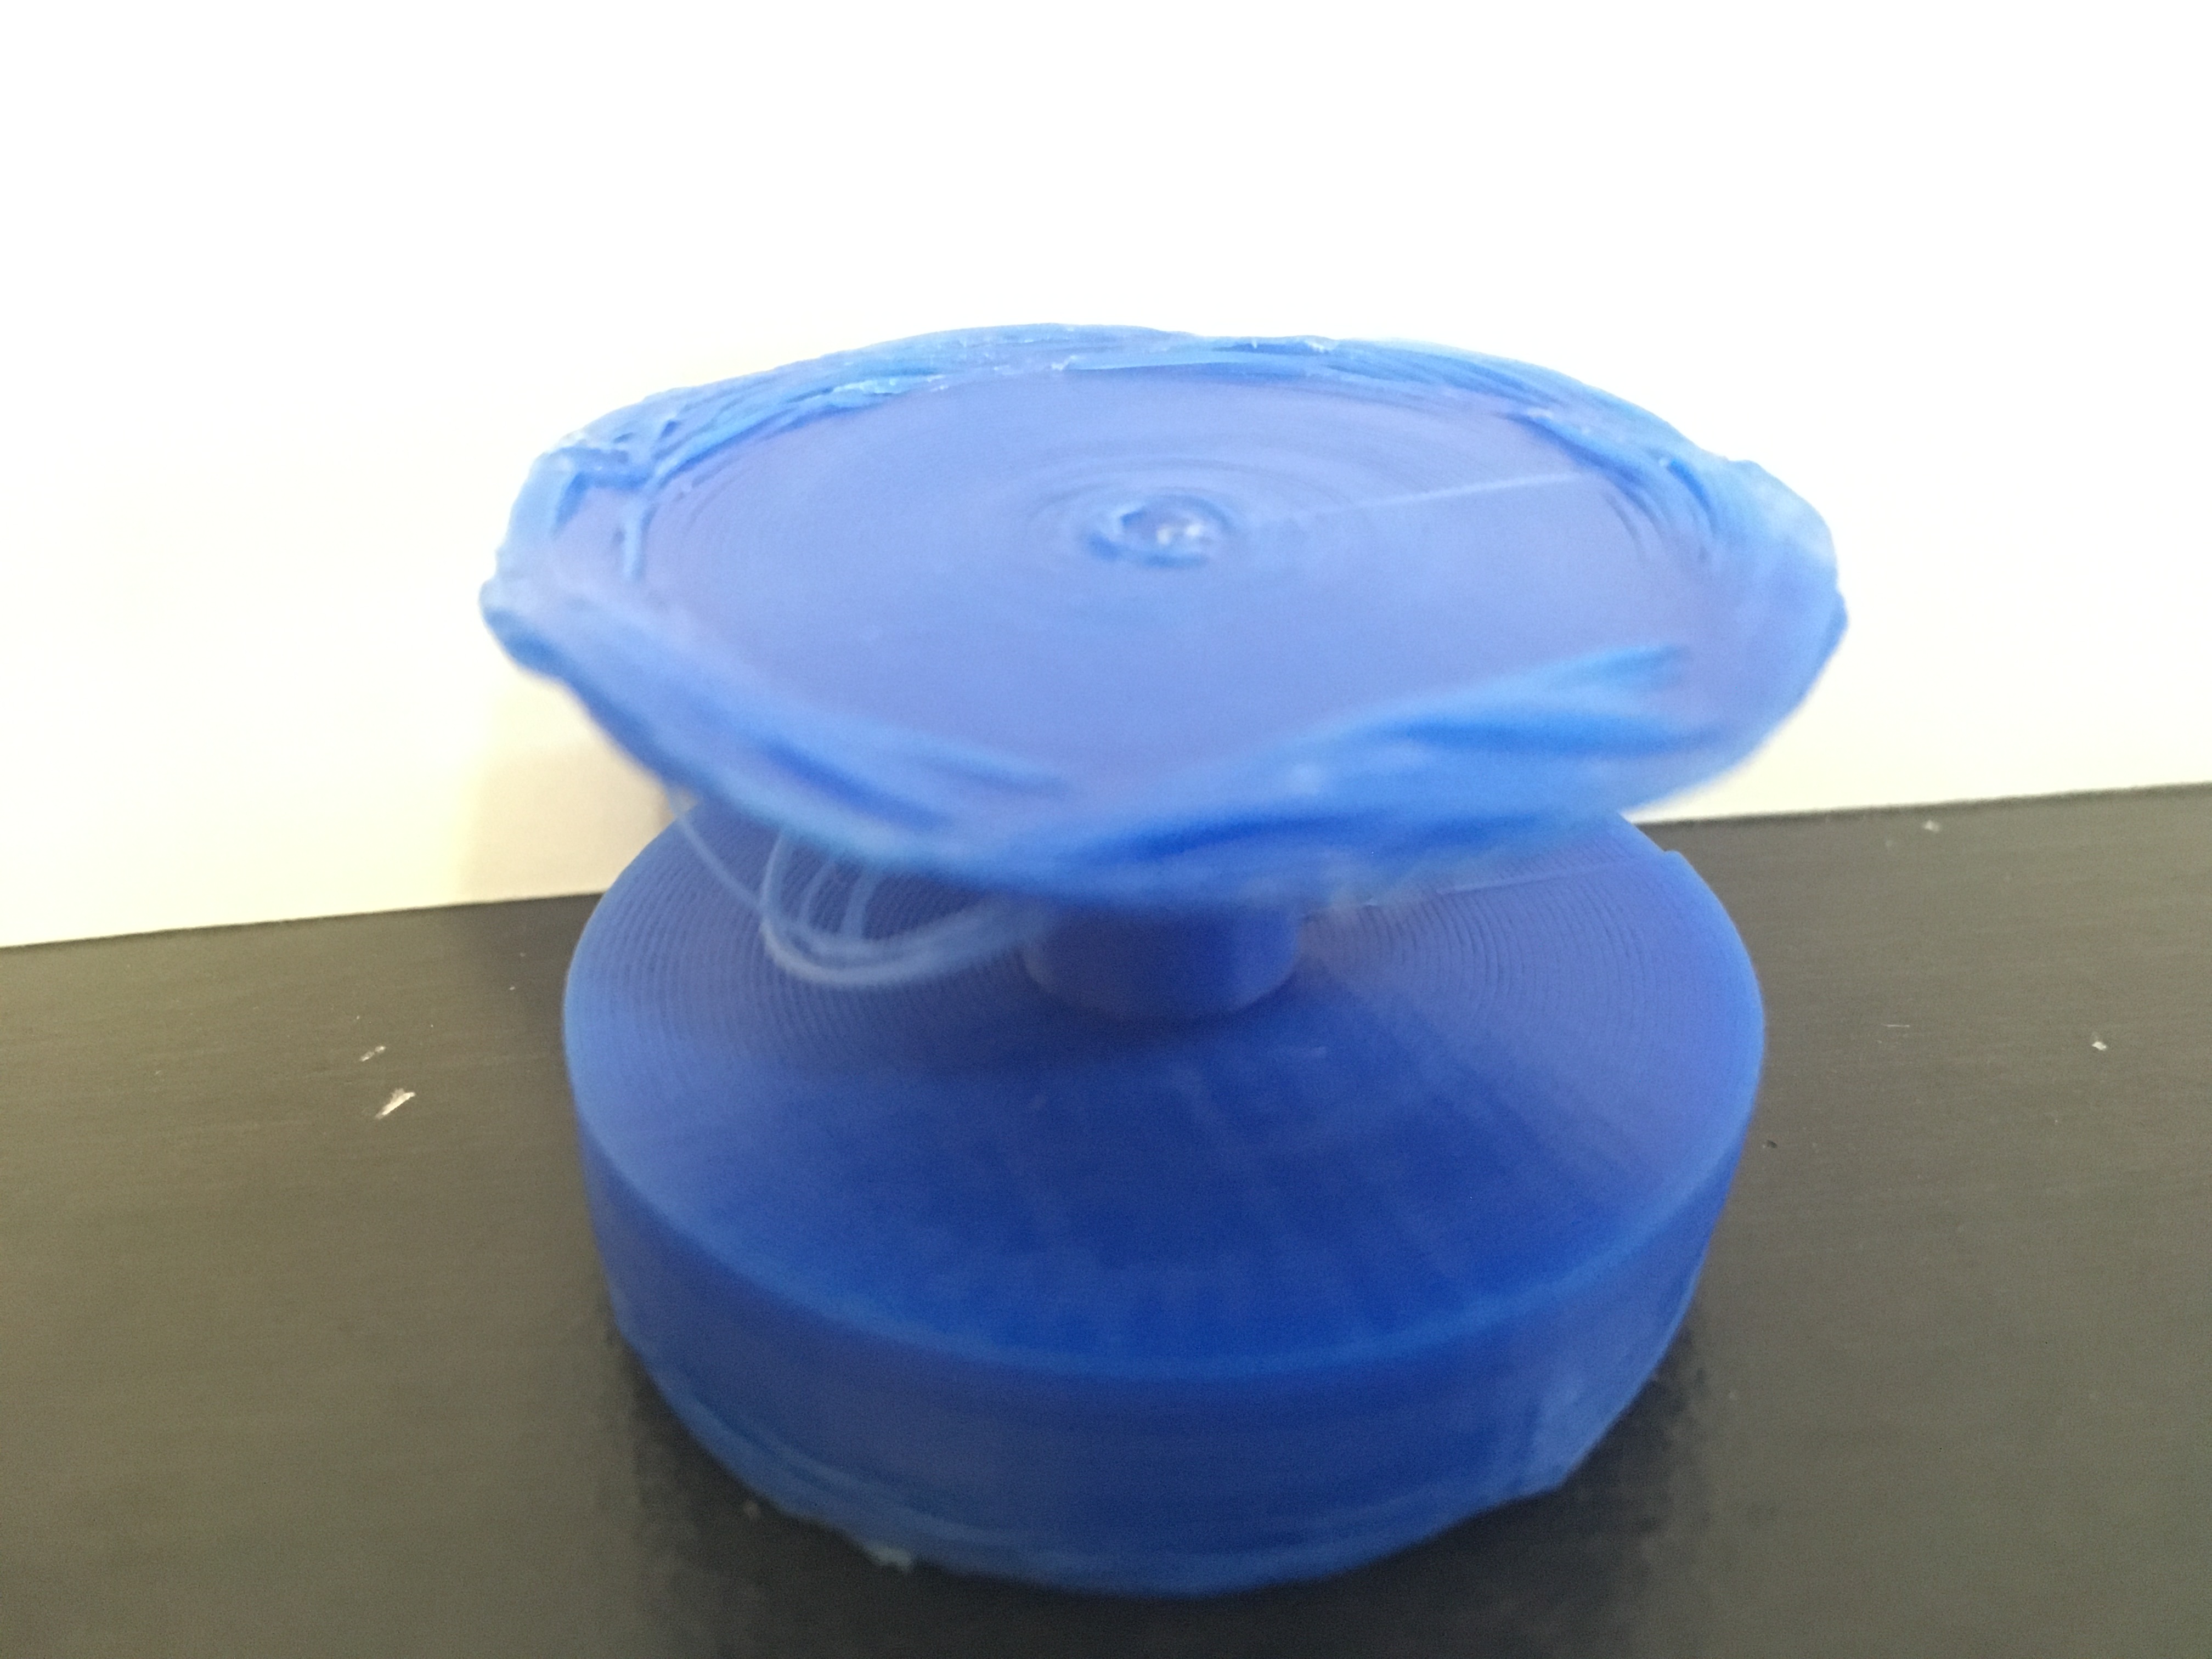
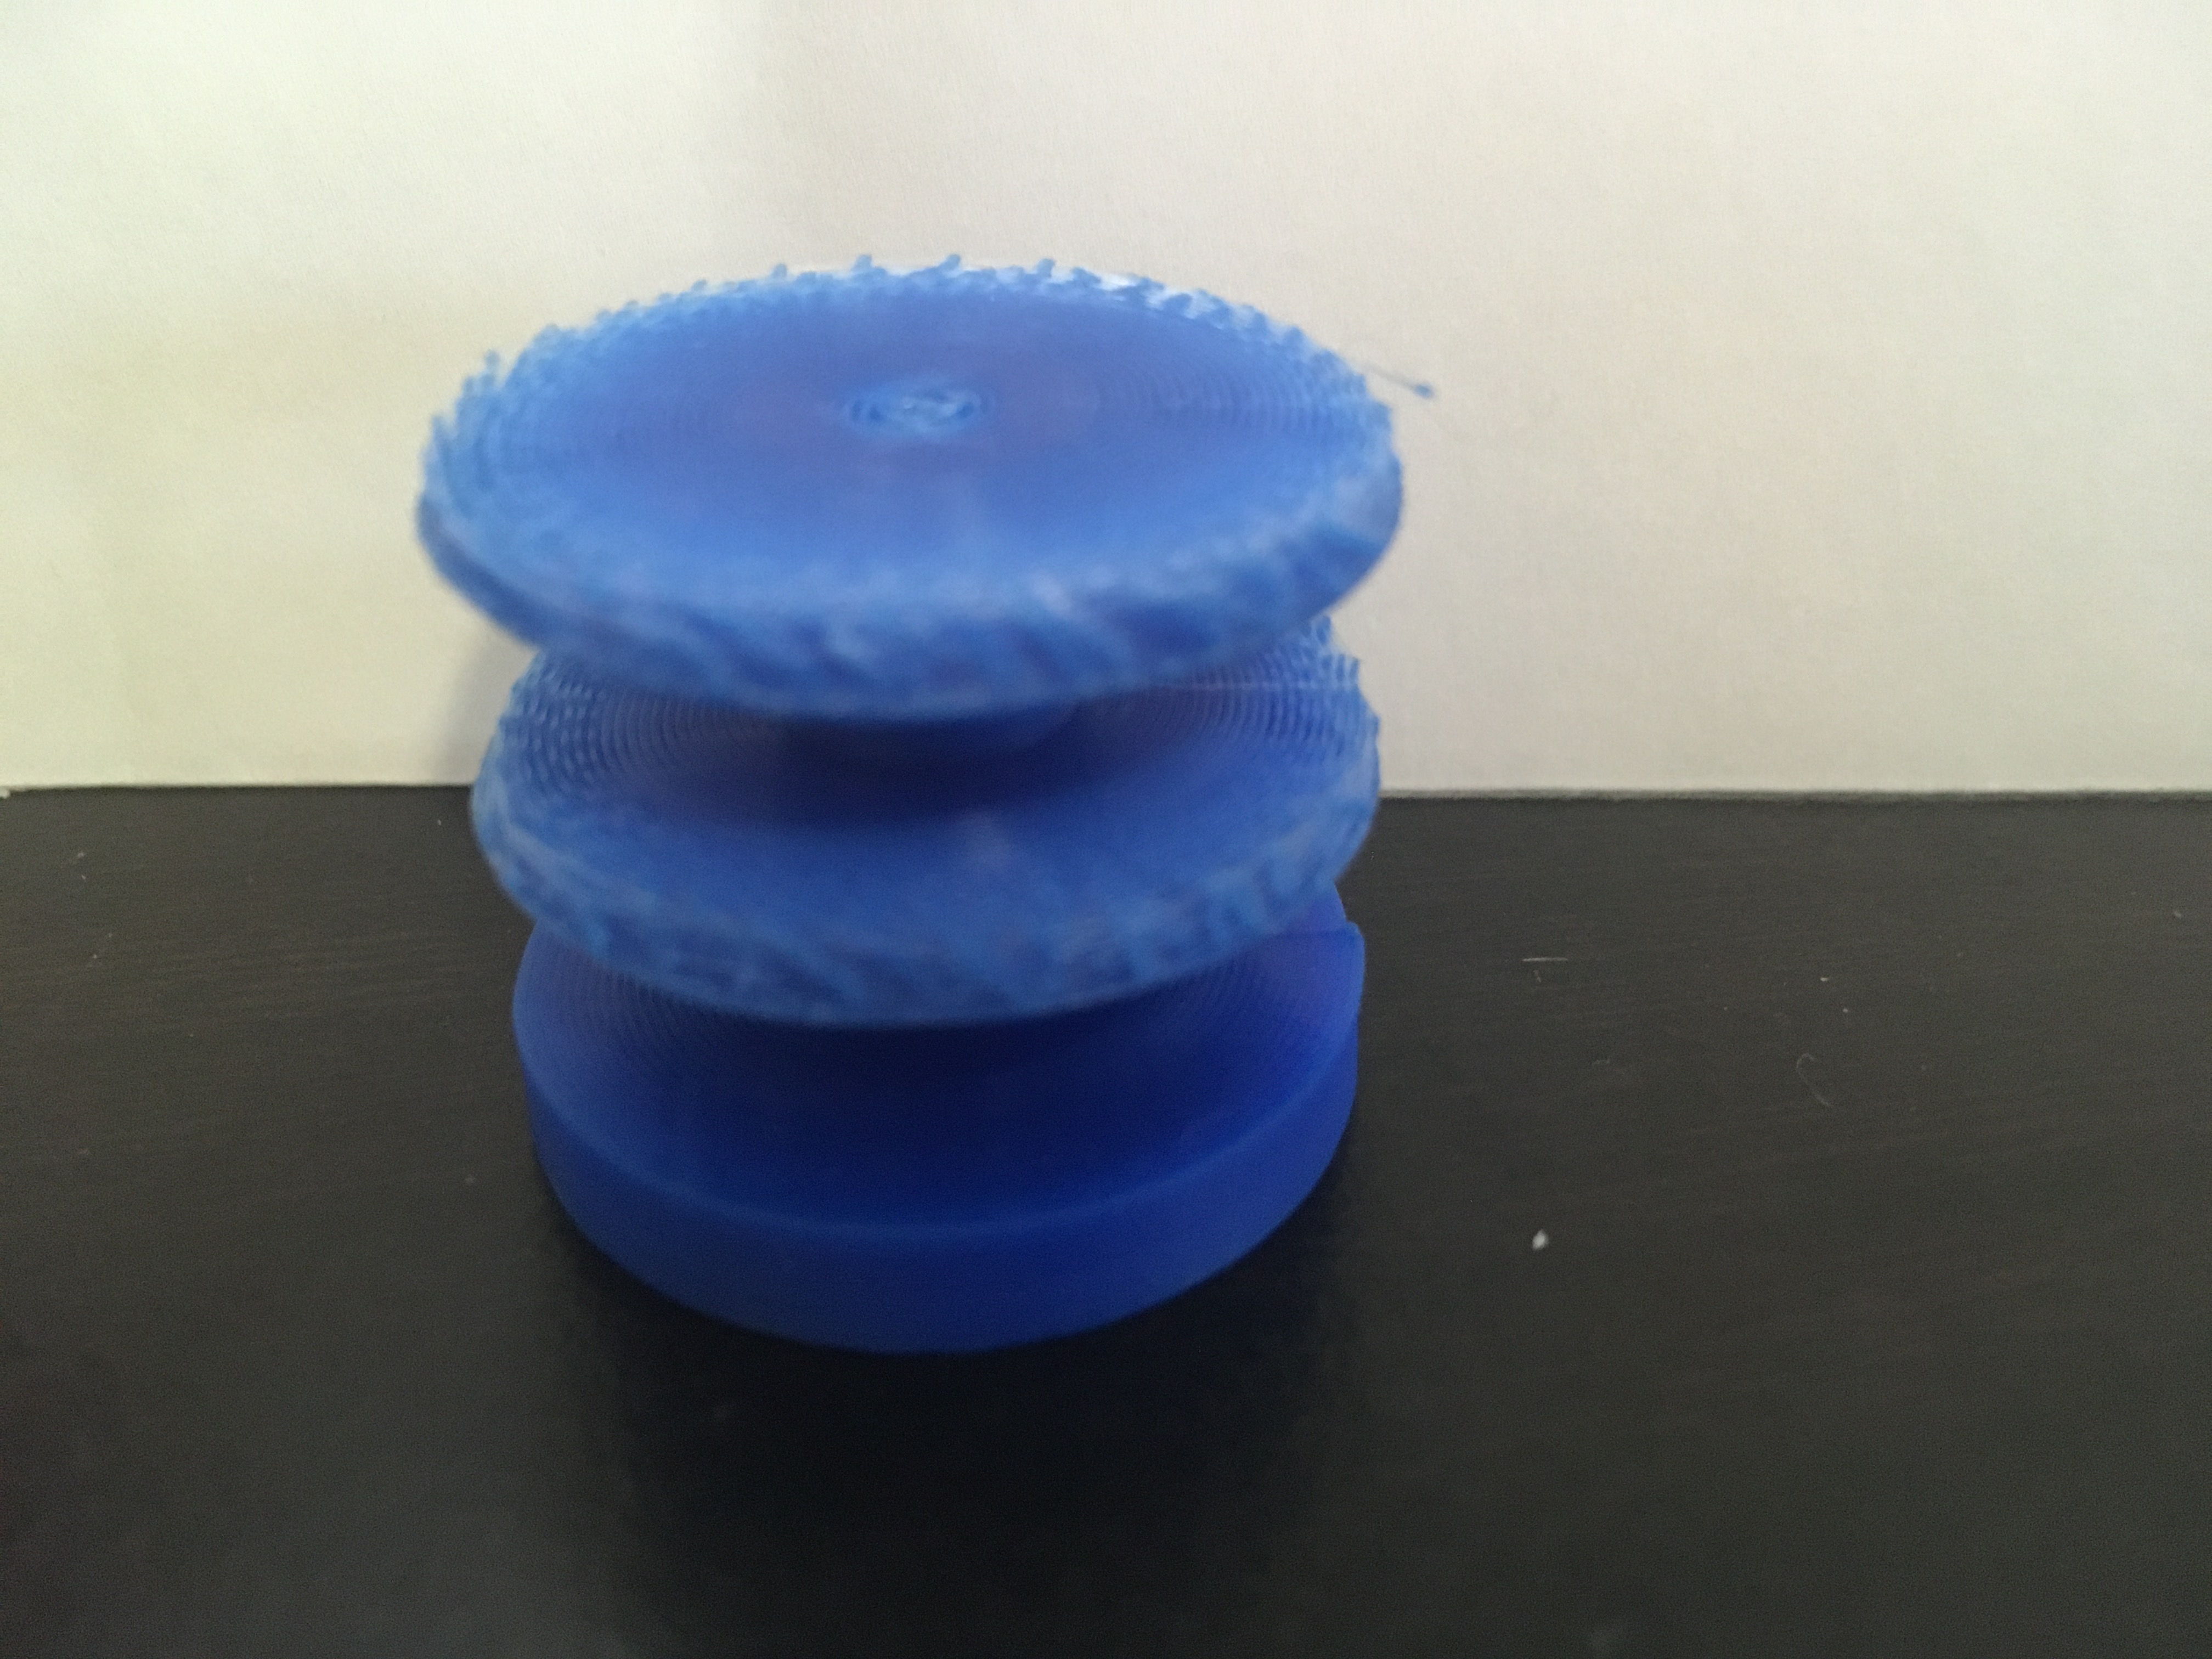
A small blue circle of plastic and a larger cylinder
The first circle I printed next to a cylinder of stacked circles.

Mushrooms

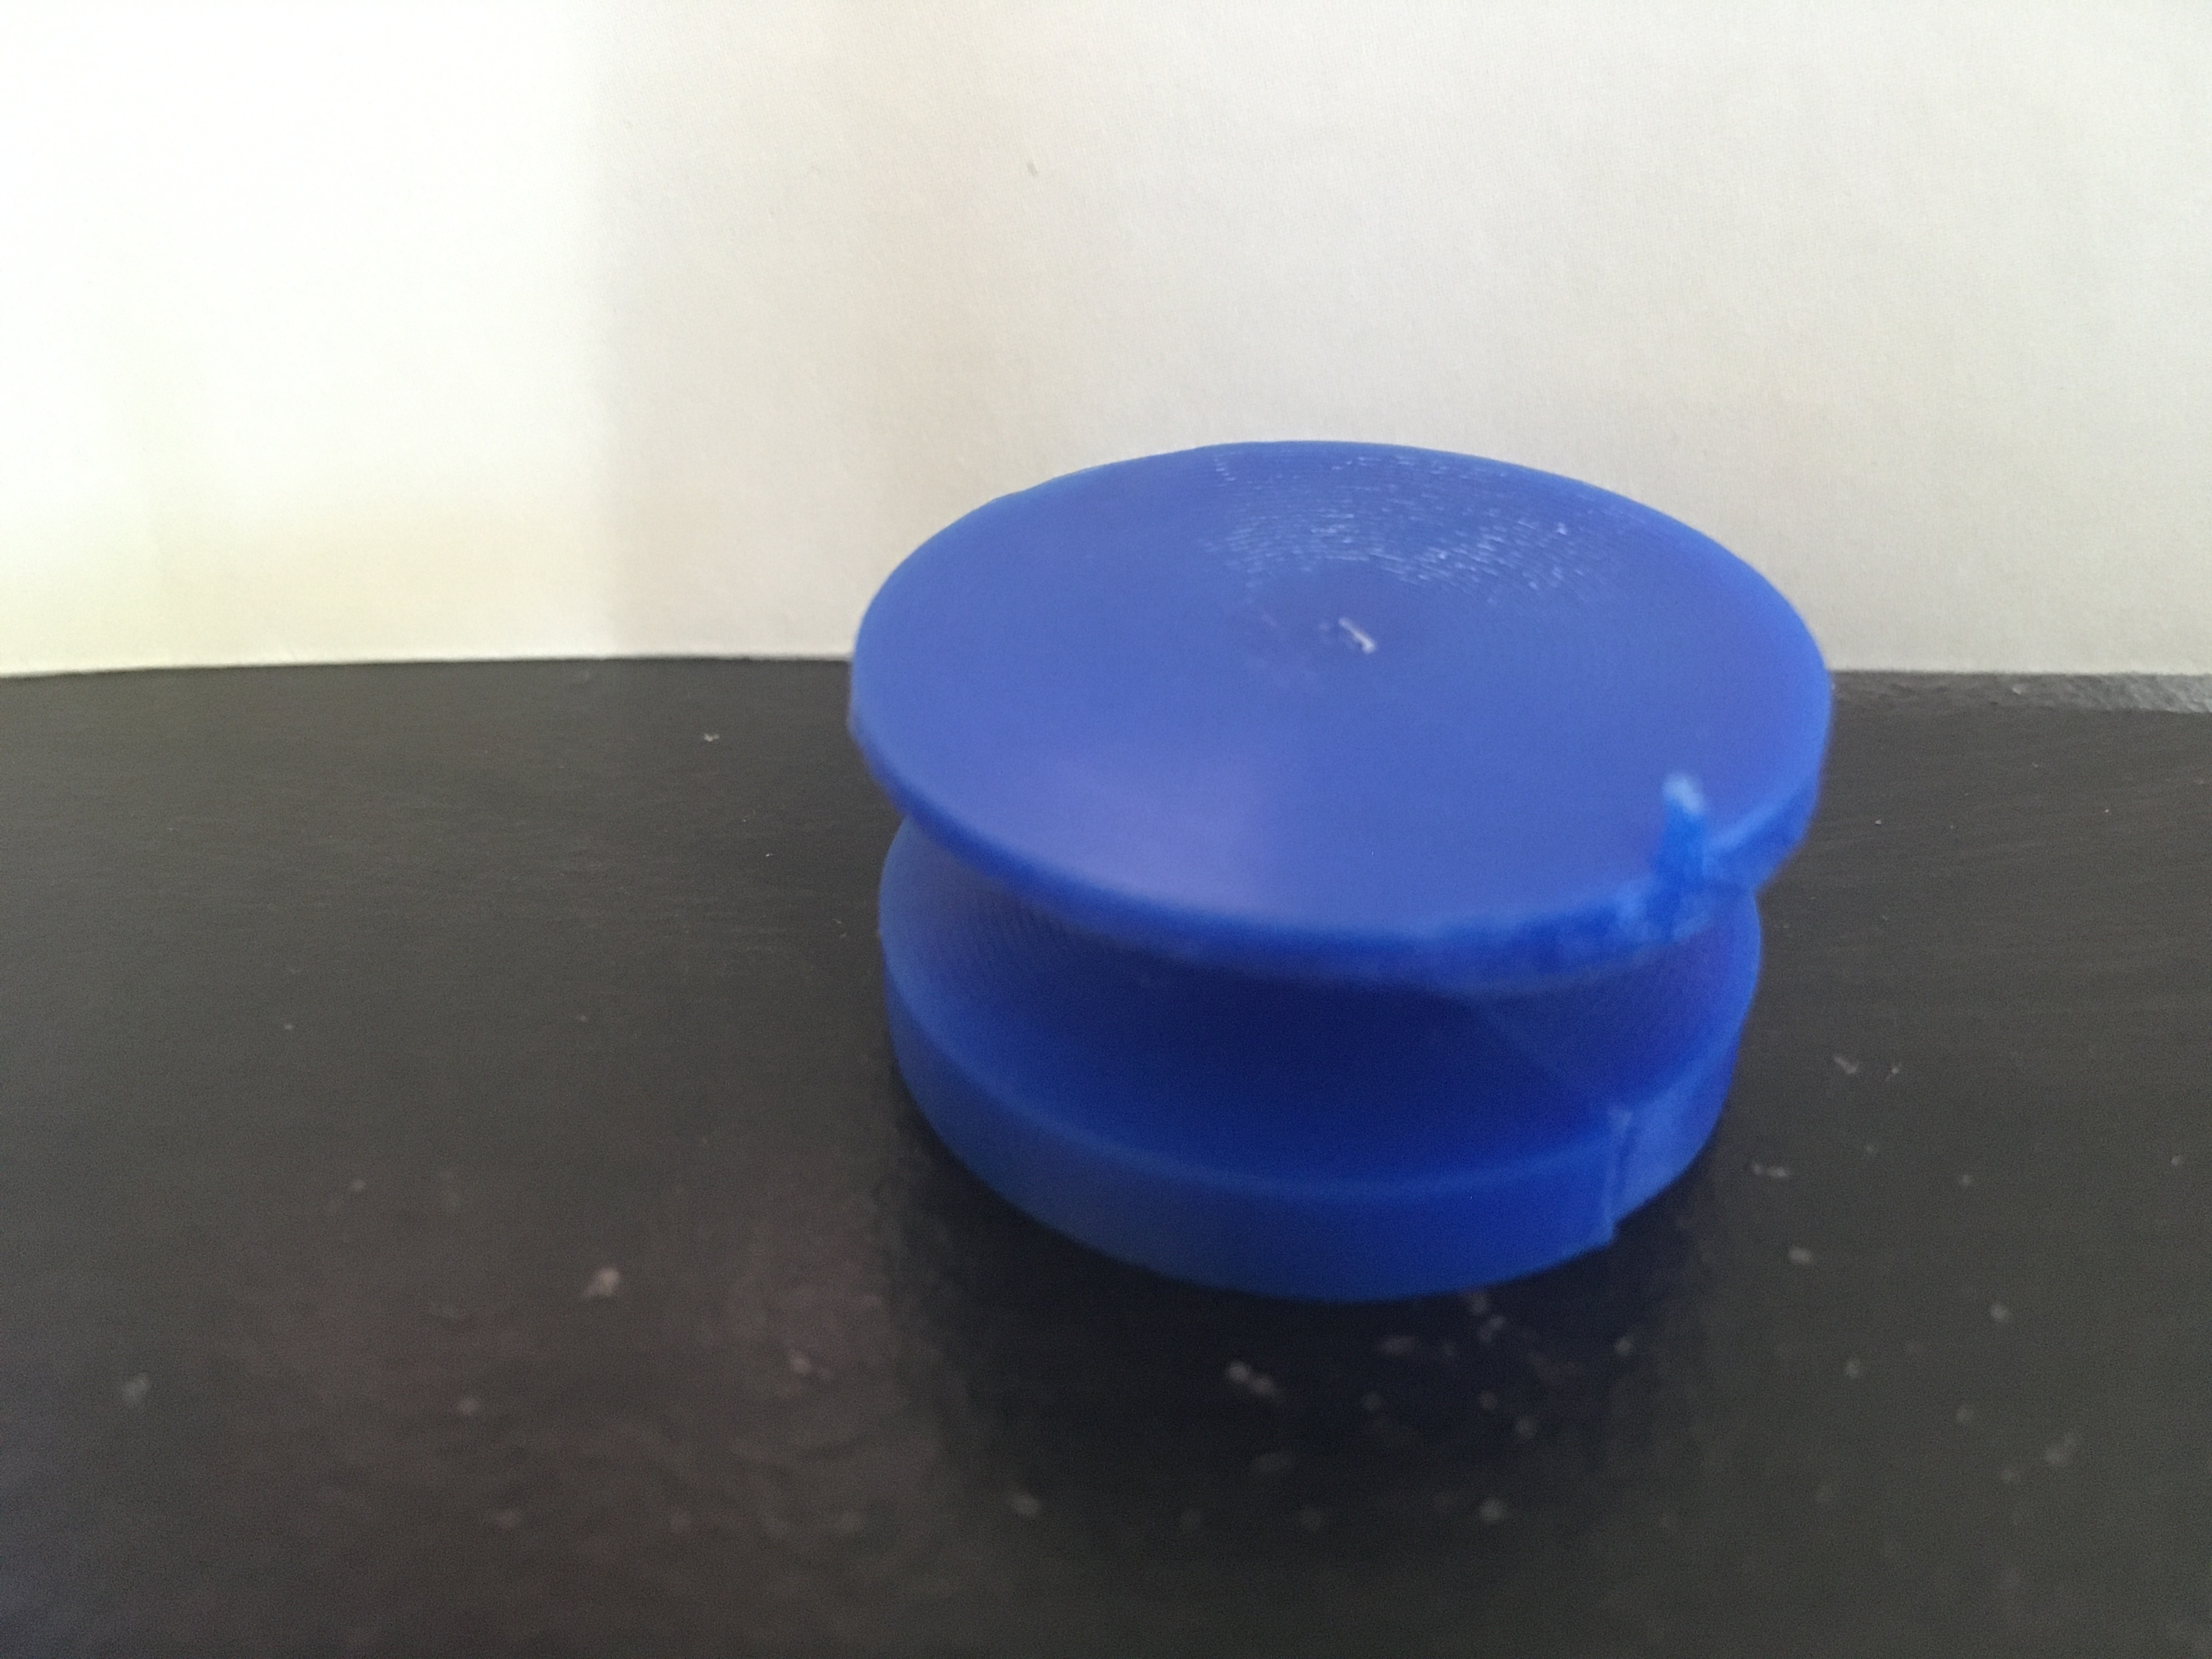
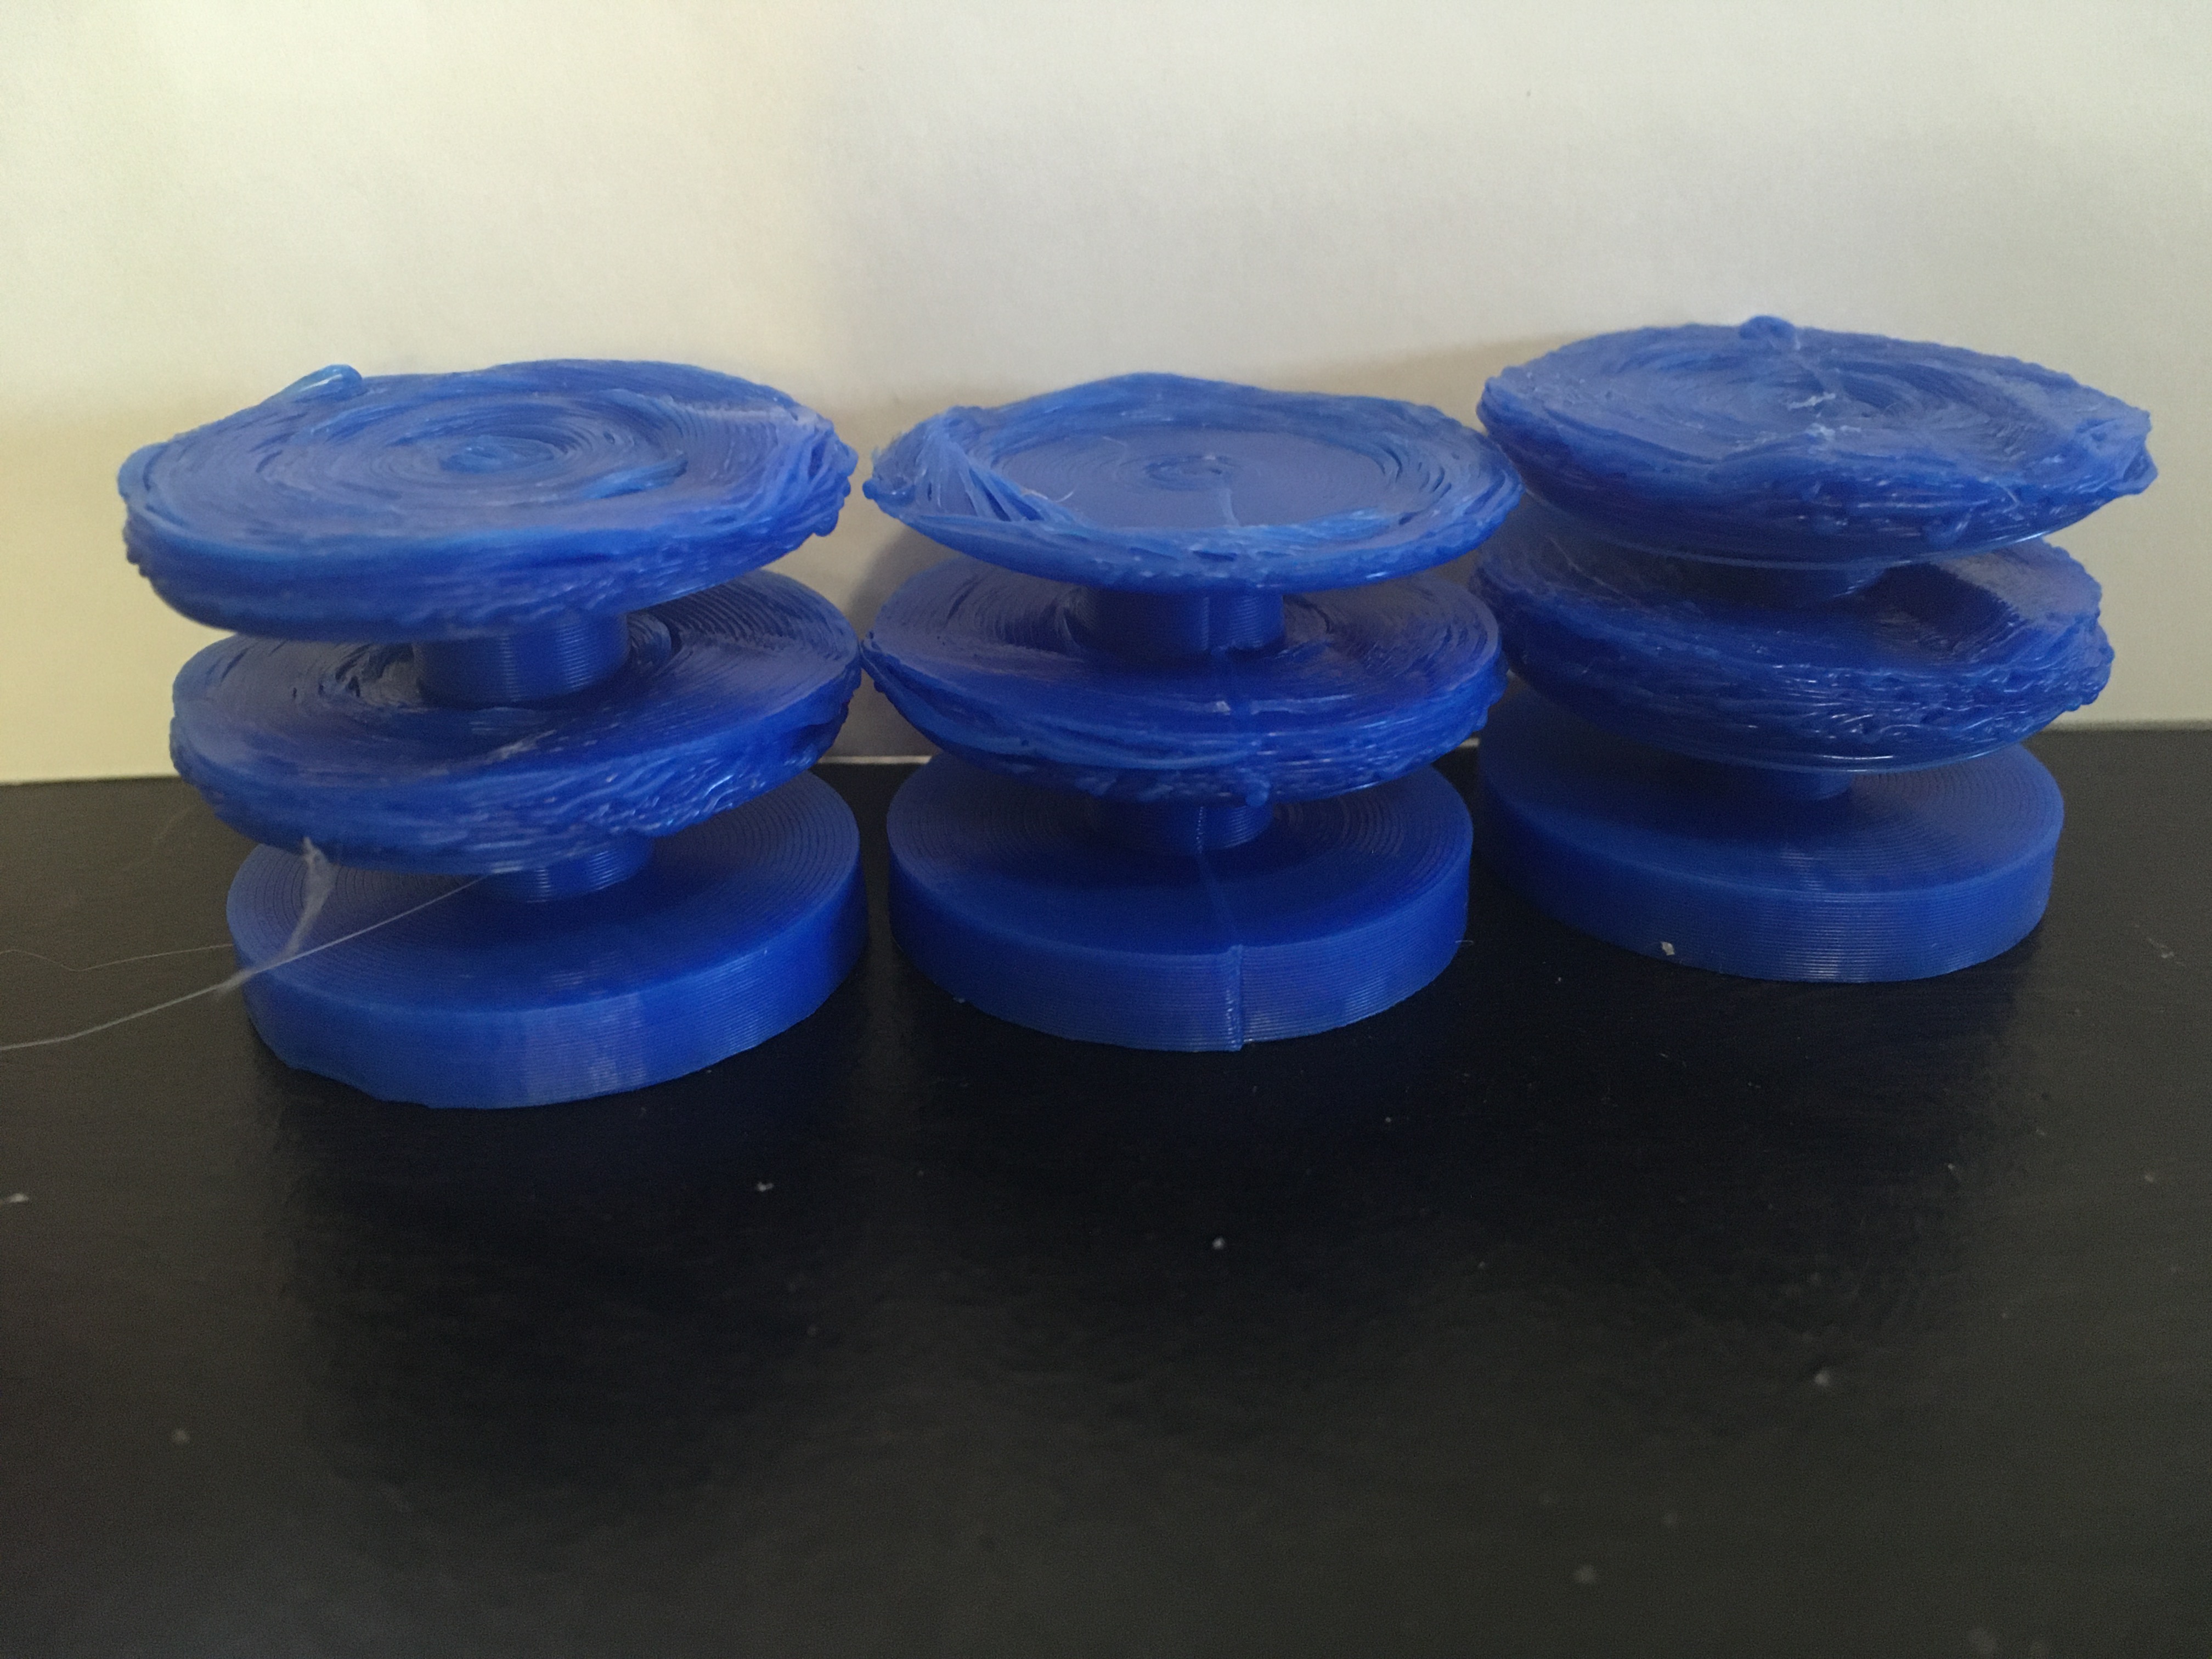
By stacking cylinders, I was able to generate a mushroom. This was the first time I actually did any supportless overhangs. I made some guesses at how much overlap would be needed, which were close but not quite right:
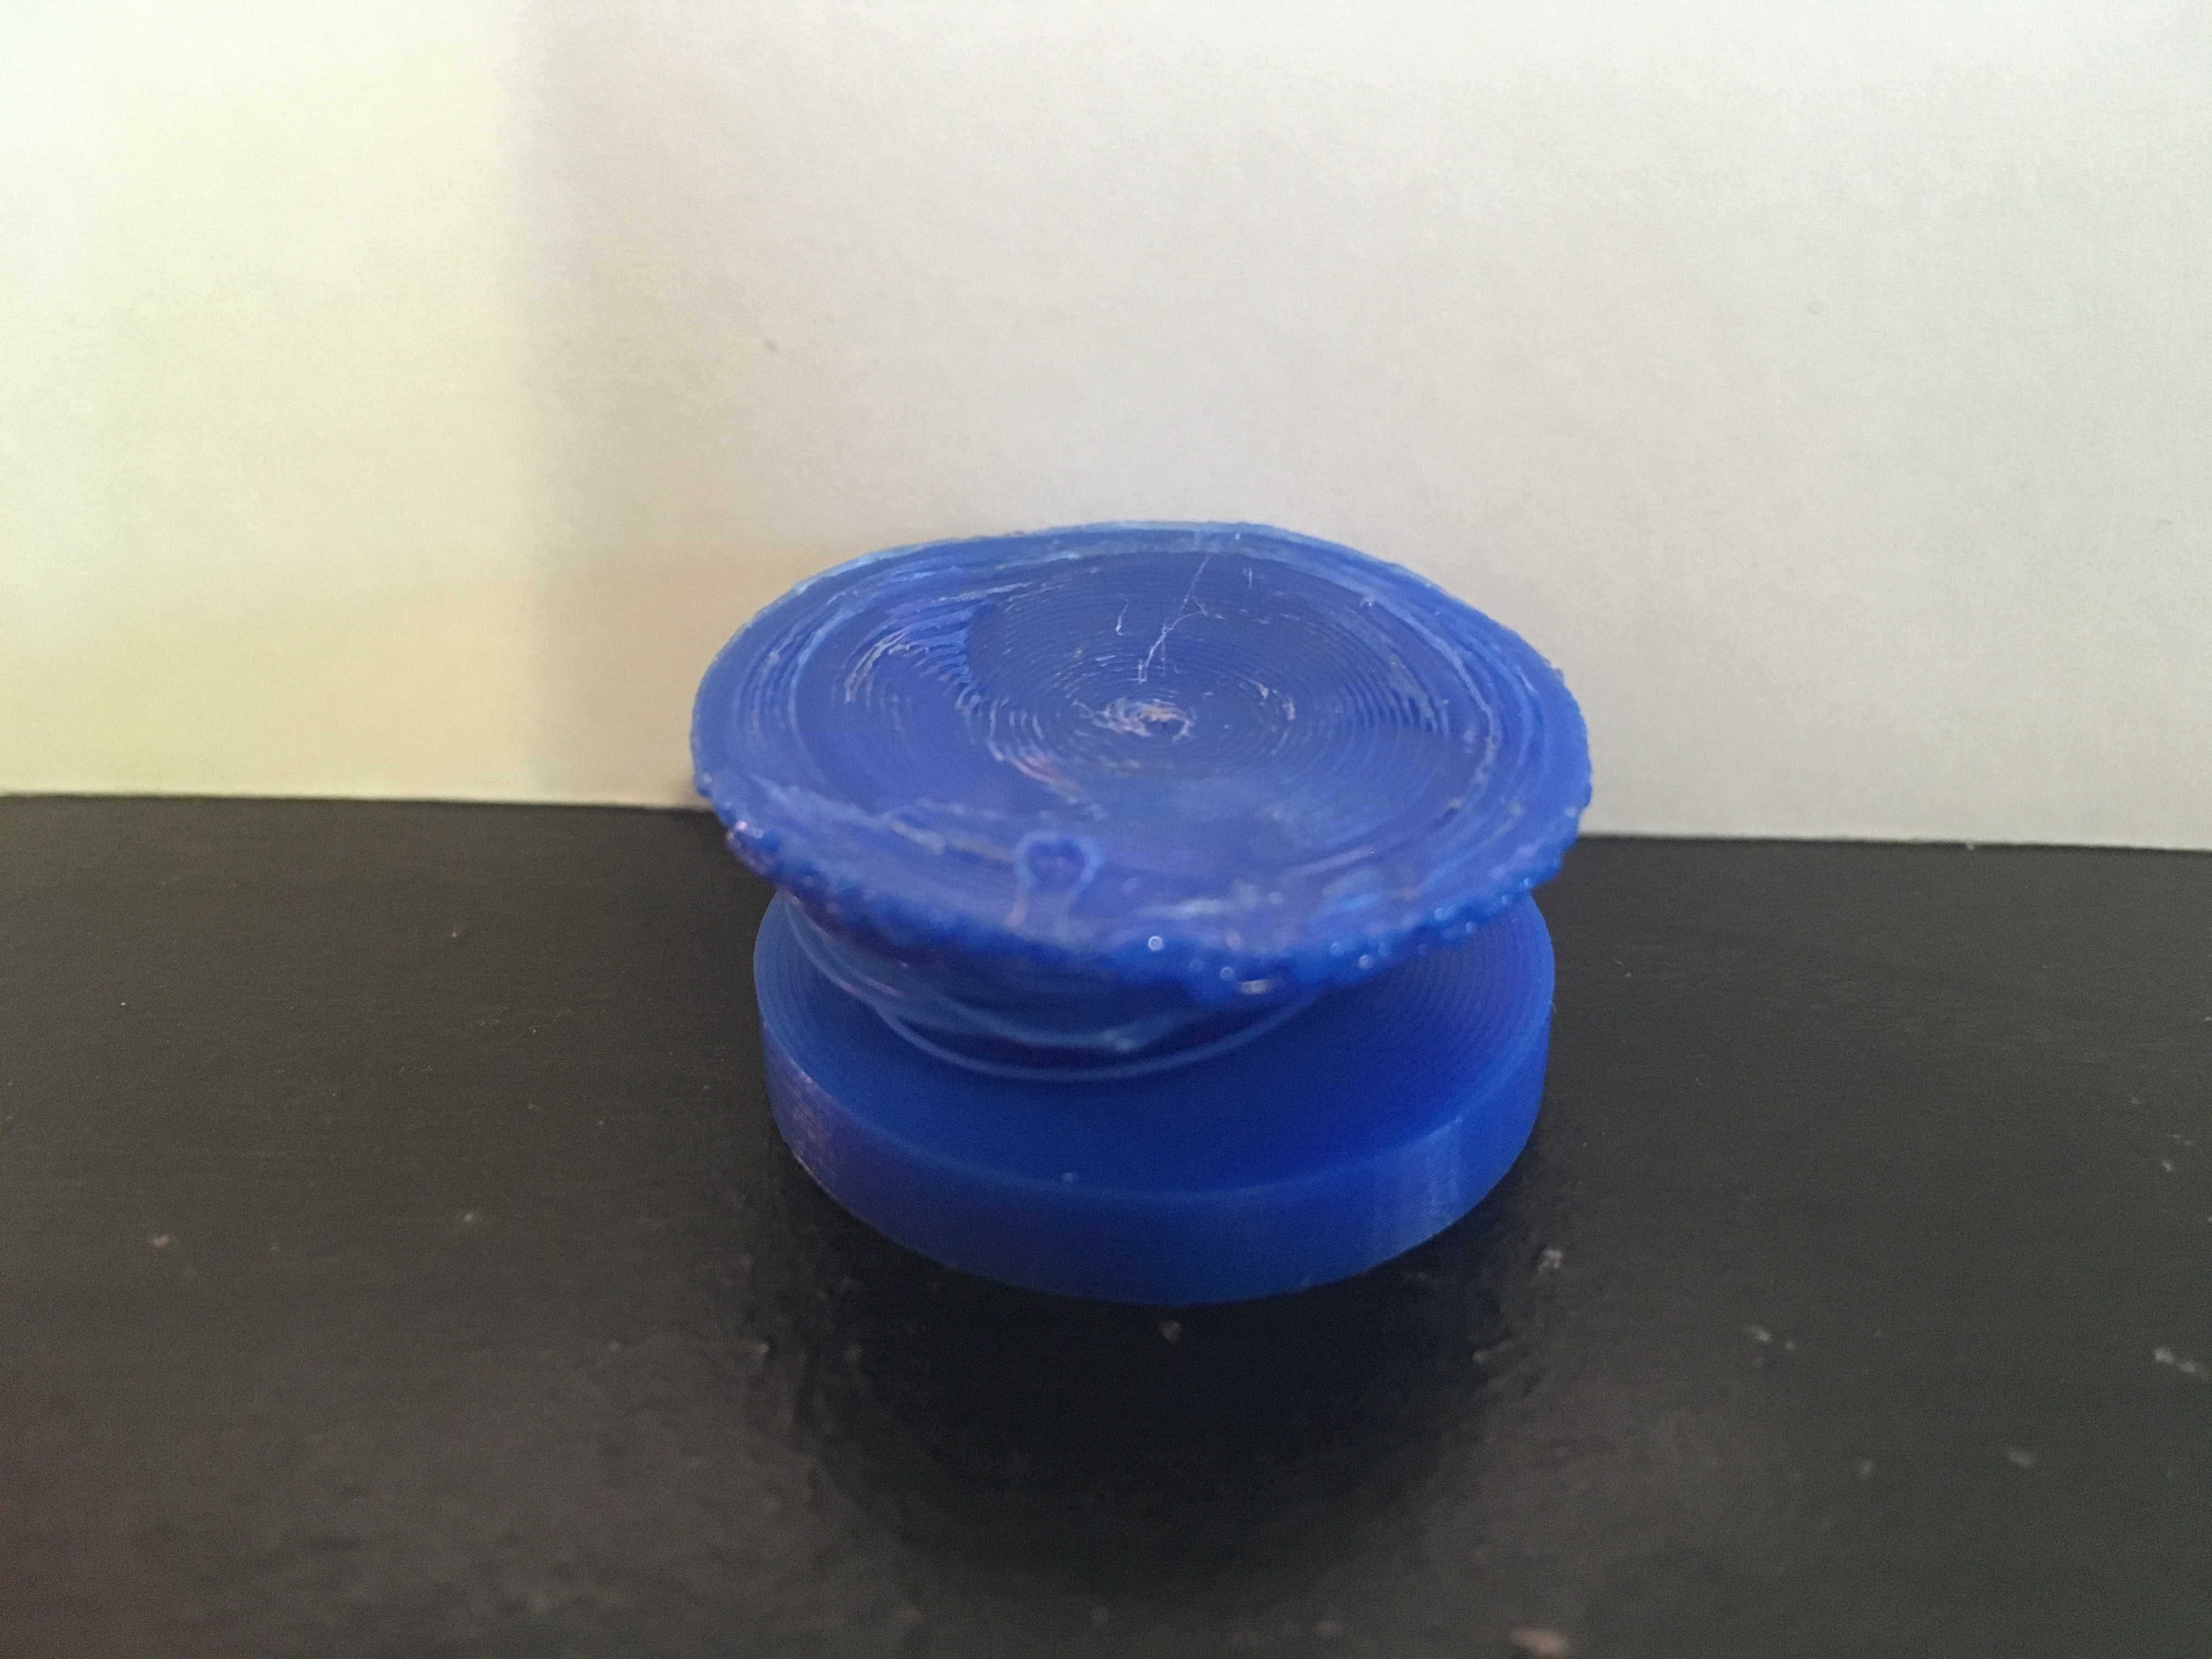
A mushroom with sagging filament and a rough surface
The first overhang I tried.
There were two main problems here: First of all, some filament had sagged under the overhang. I tightened up the line spacing on the overhang layer and this problem went away. The bigger problem, though, is that uneven and wavy top surface. I think this is caused by the overhang layer warping upwards, so I’m effectively trying to fill a funnel and expecting it to be a cylinder. This results in uneven distribution of plastic around the edge of the cylinder. For the next attempt, I manually lowered the flow rate for the upper cylinder when the printer was printing at the edges until a normal flat layer was created. This was boring and tedious, but it resulted in a nice top finish:
A mushroom
I sat in front of my printer for far too long getting this to work.
Encouraged, I tried stacking another mushroom to create another mushroom. The funnel-filling problem did not magically disappear as I’d hoped, so over a couple of attempts I had the G-code generator trail the flow off towards the edge of the circle. It took a few tries to get this right:
Three failed double mushrooms
Failed attempts at double mushrooms. The leftmost one has nearly the right flow variance algorithm, but I misplaced a negative sign which caused more flow on the edge.
A very not dense double mushroom
This mushroom printed the entire cap with the flow decay, which resulted in weak and translucent layers.
I was able to tune the layers with decayed flow so there was only as many as needed to get a flat layer. There’s probably more room for improvement in the algorithm, but I’m happy with where I ended up.
Two nice double mushrooms
Tuning the thickness of the decayed-flow layers. They are visible as light bands near the bottom of the middle and top cylinders.

Spiral Easing

Because the toolpath is generated from a spiral, the circumference is not consistent and has a sharp jump where the spiral ends. After playing around in this Desmos calculator I found a polar equation that nicely averaged between the spiral and a perfect circle:

A circle filled by a spiral
Here, the red line is the target circle, the blue line is the normal spiral, the black line is the outline of the actual printed plastic, and the green line is a line to circularize the spiral.
This isn’t perfect in practice, and I end sometimes end up with a small blob on the seam. I think this is due to the pressure at the end of my Bowden tube lagging behind the pressure caused by the extruder. This is fine when the line width is constant, but with a varying line width like this, the printer is extruding too much filament at a given spot because the pressure at the hotend is from a few millimeters ago. I might be able to mitigate this by using a direct drive extruder or by decreasing the flow multiplier for the ease (though I’m hesitant to hardcode such a printer-dependant factor).

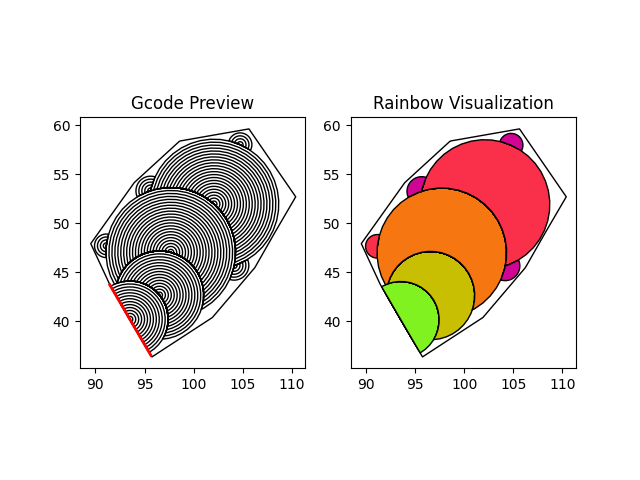
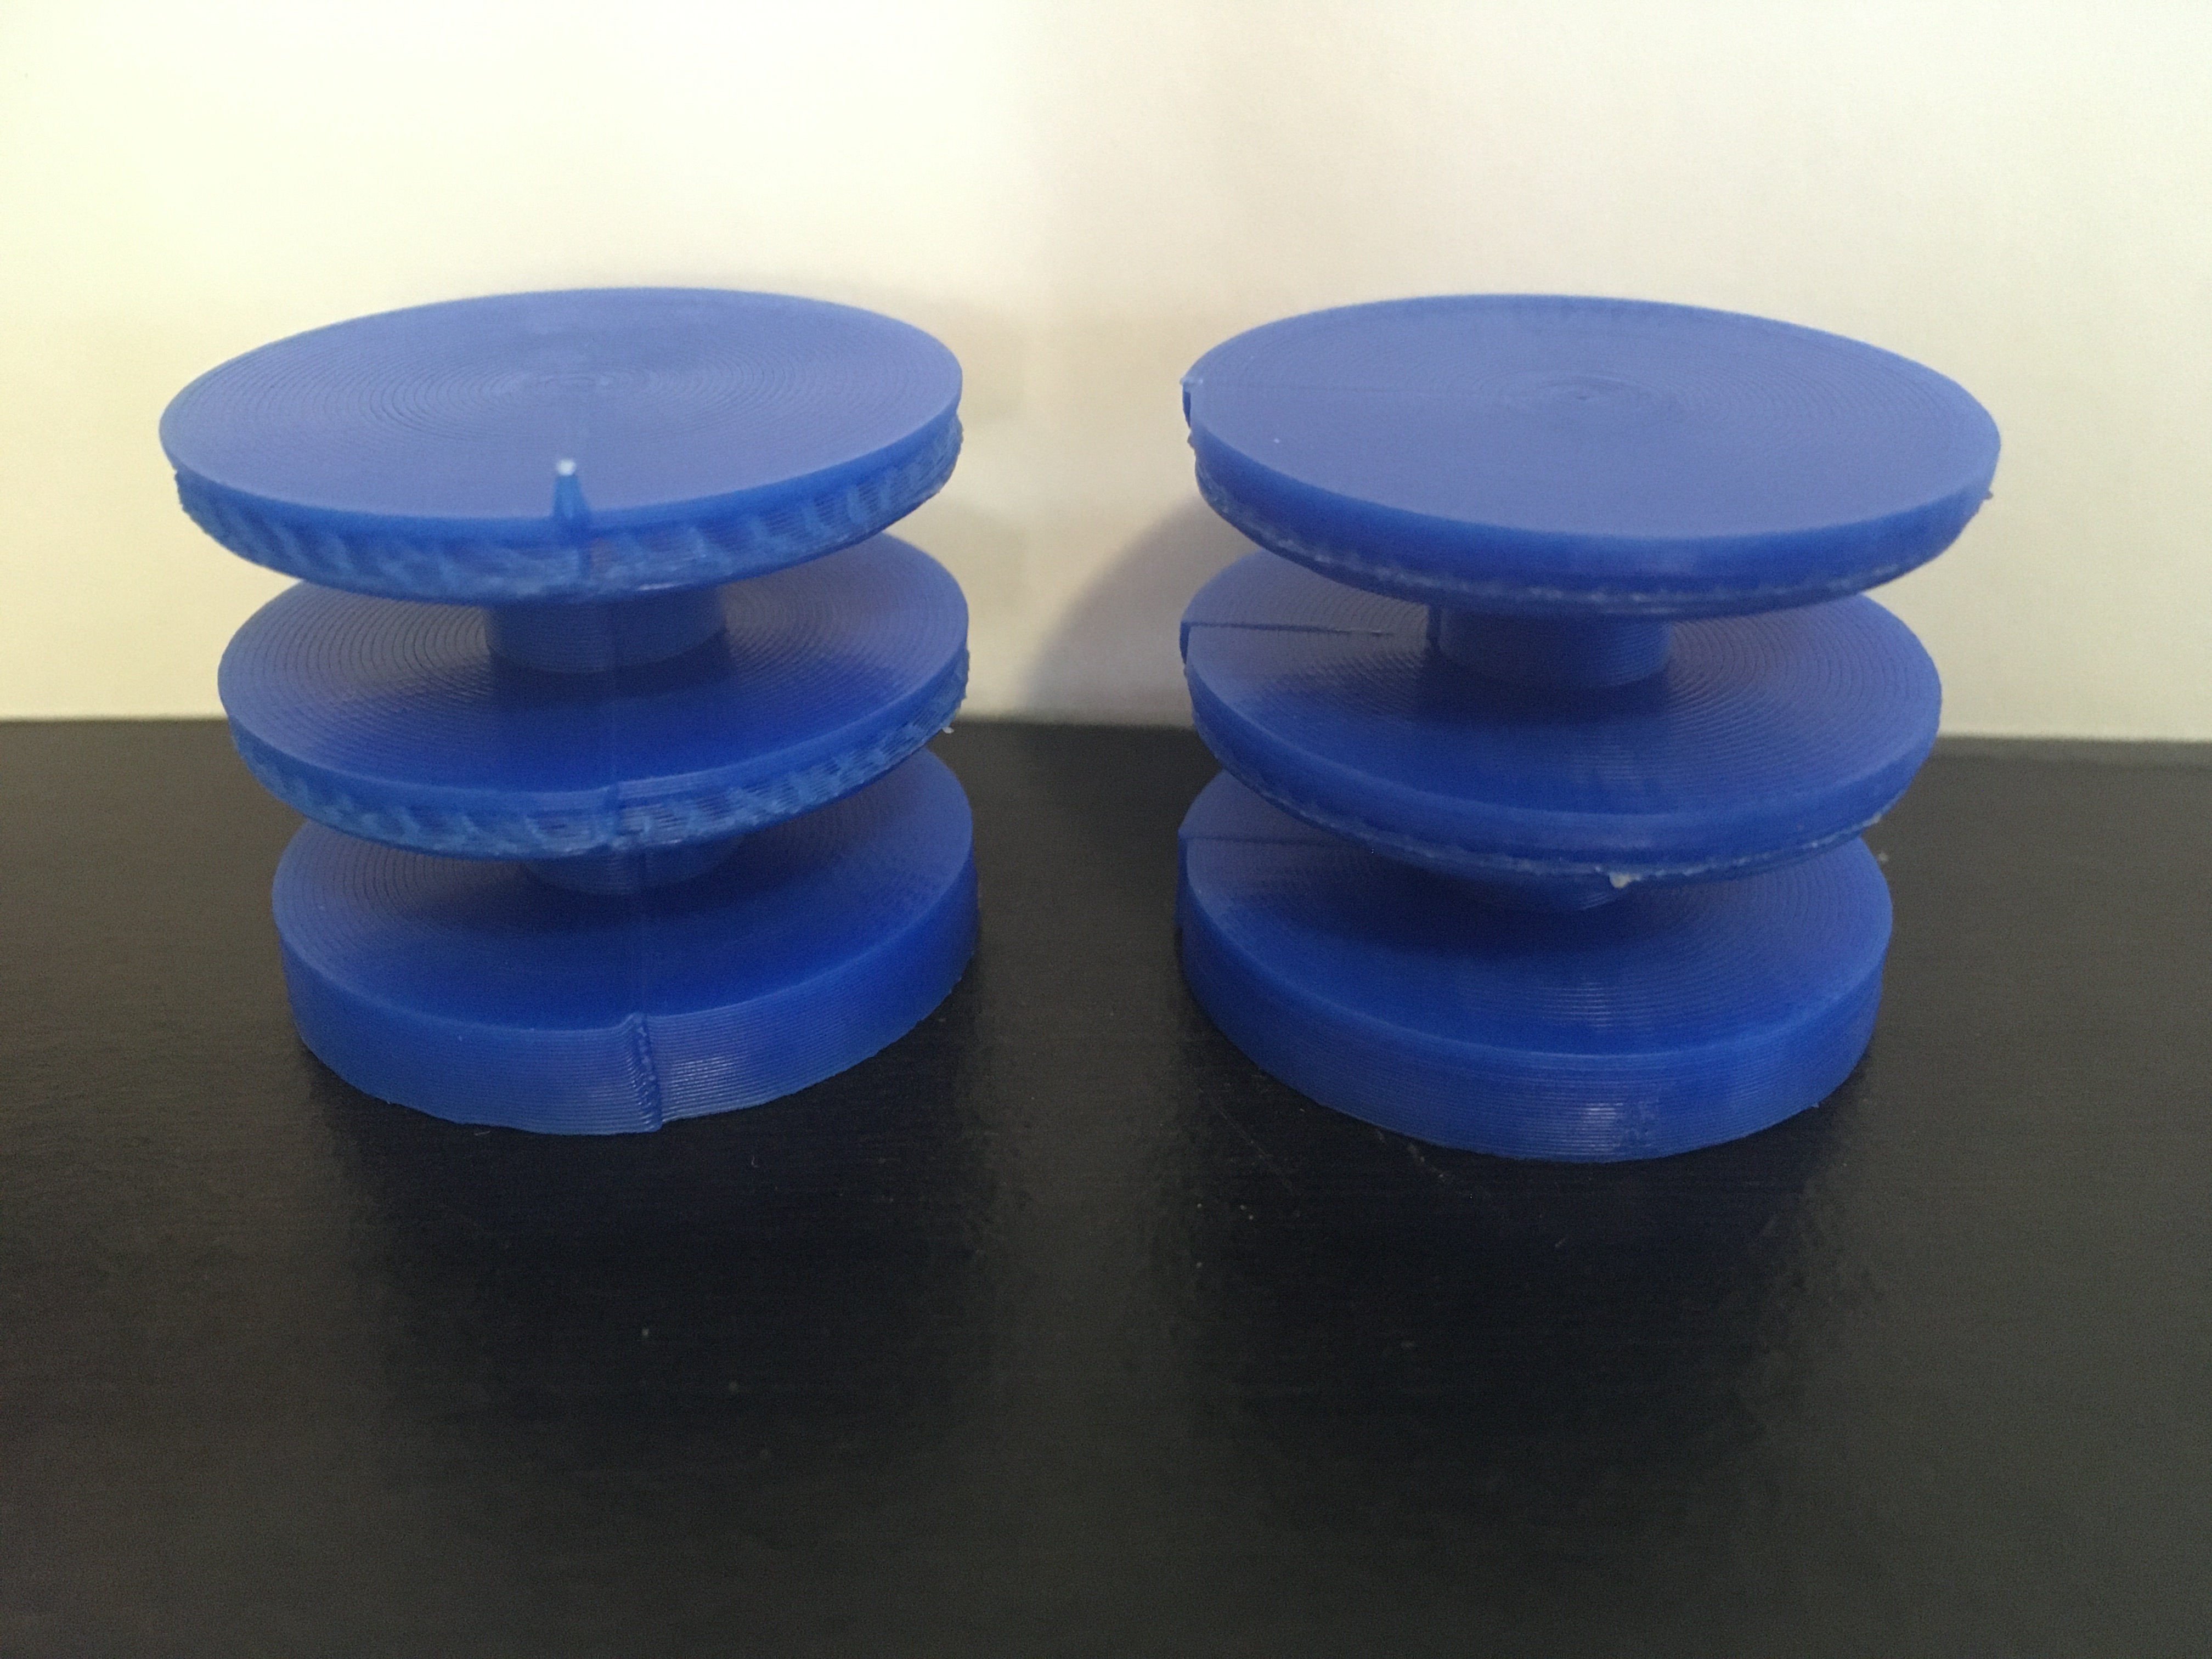
To Bigger and Better Things

Now that I had some nice mushroom-generating code, I tried to change some of the parameters to better fit my initial roller design. I had to abort the first print out of the printer:

A larger failed single mushroom
The issues are back! Turns out they have to be tuned for each size of mushroom.
This is where I’m at now. I’ve somewhat run out of time to work on this, and I haven’t yet tried to guess at better parameters for different sized mushrooms. I’m happy with how far I’ve come, and I may try to change the design to use the rollers I can produce. I really enjoyed using Rust and will continue to learn it and use it where I can. I specifically found the seamless file handling (It just automatically unloads when it goes out of scope!) and helpful errors (Does any other language tell you exactly how to fix the error you caused?) very nice to use. I might return to this project and G-code generator, but it’s more likely I’ll use what I learned here to inform other experimental 3D printing projects.